Containerize the game using Docker, and then deploy it on Amazon Elastic Beanstalk.

Introduction
In this blog, we'll take this game called, "2048", from GitHub, make a Dockerfile of it, and then deploy it on Amazon Elastic Beanstalk. Let's get started...
Step1: Launch the AWS EC2 Instance
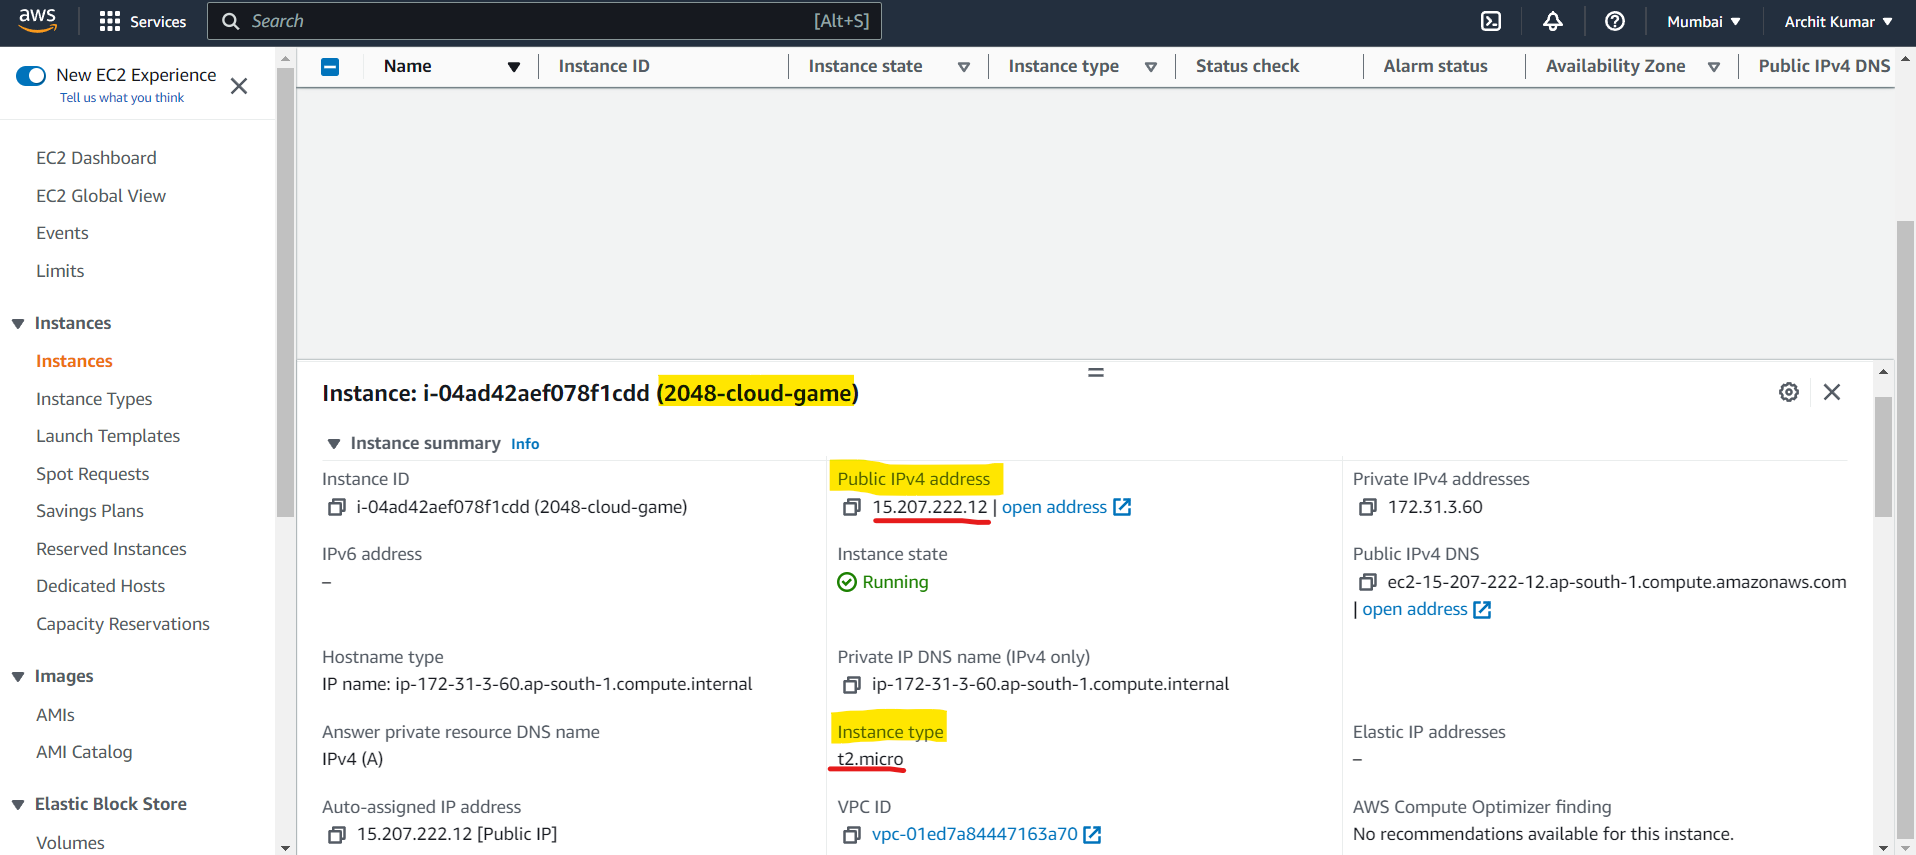
Go to your AWS console, select EC2, and launch the instance with the following configurations.
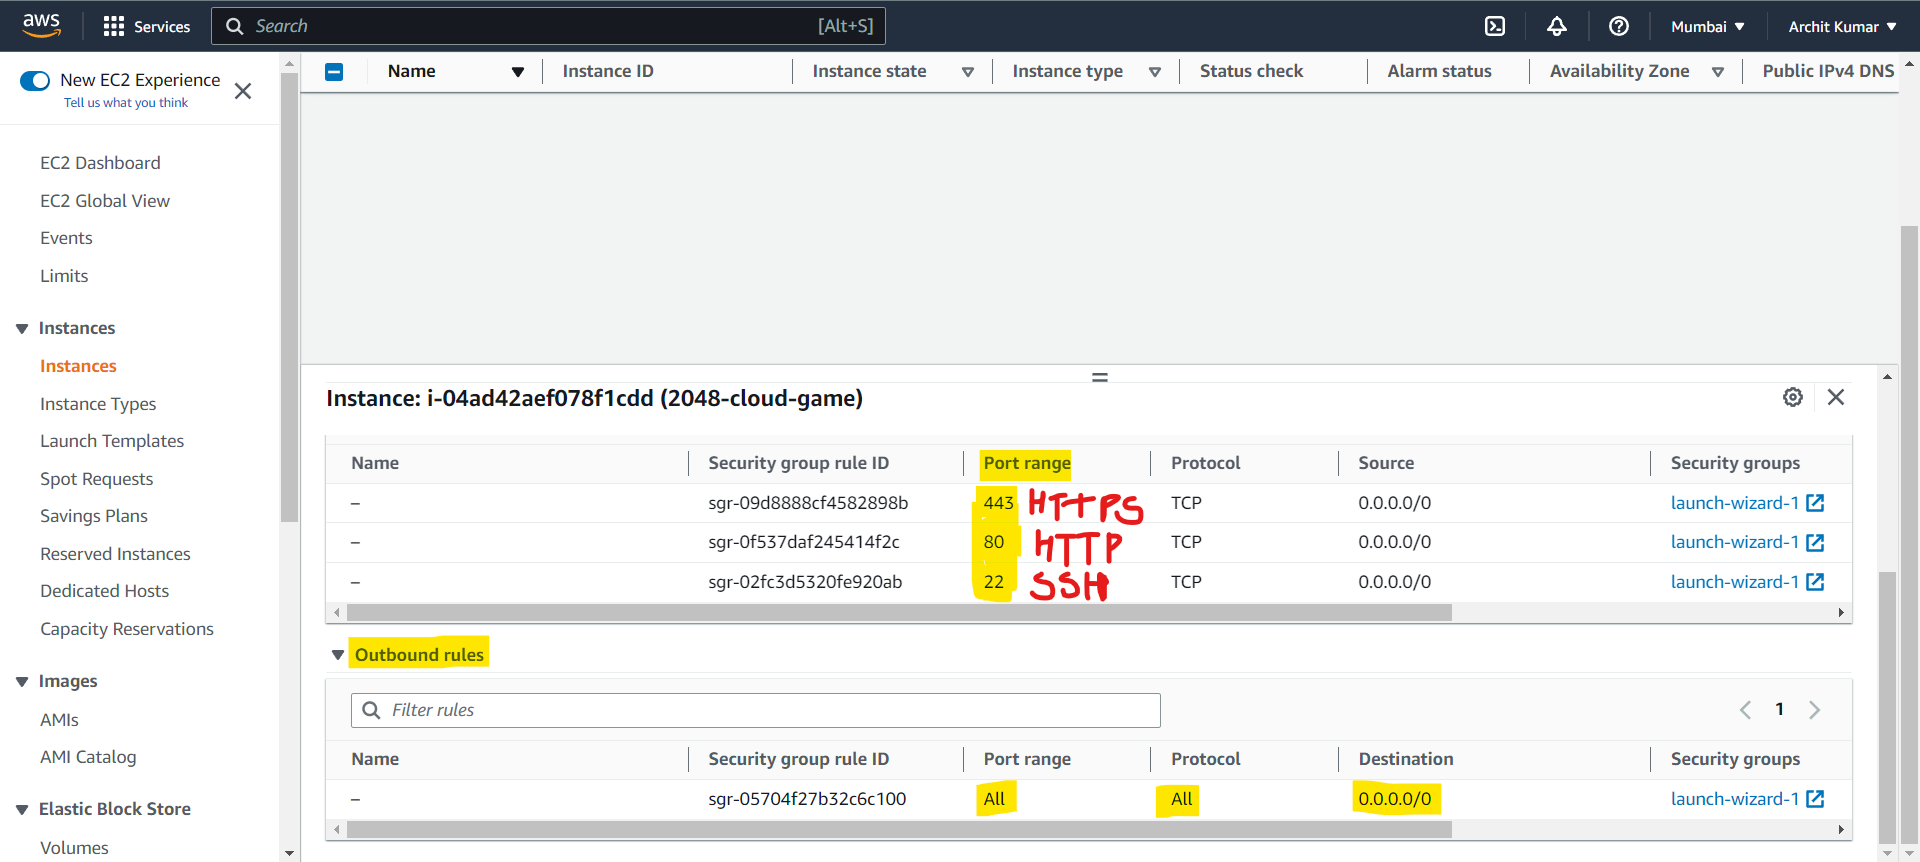
Before launching the instance, inside the "Create Security Group", make sure to allow SSH (22), HTTP (80), and HTTPS (443) to Anywhere (0.0.0.0/0).
Now, there are two ways to go inside your instance:
The "connect" button, which will launch the instance in your browser.
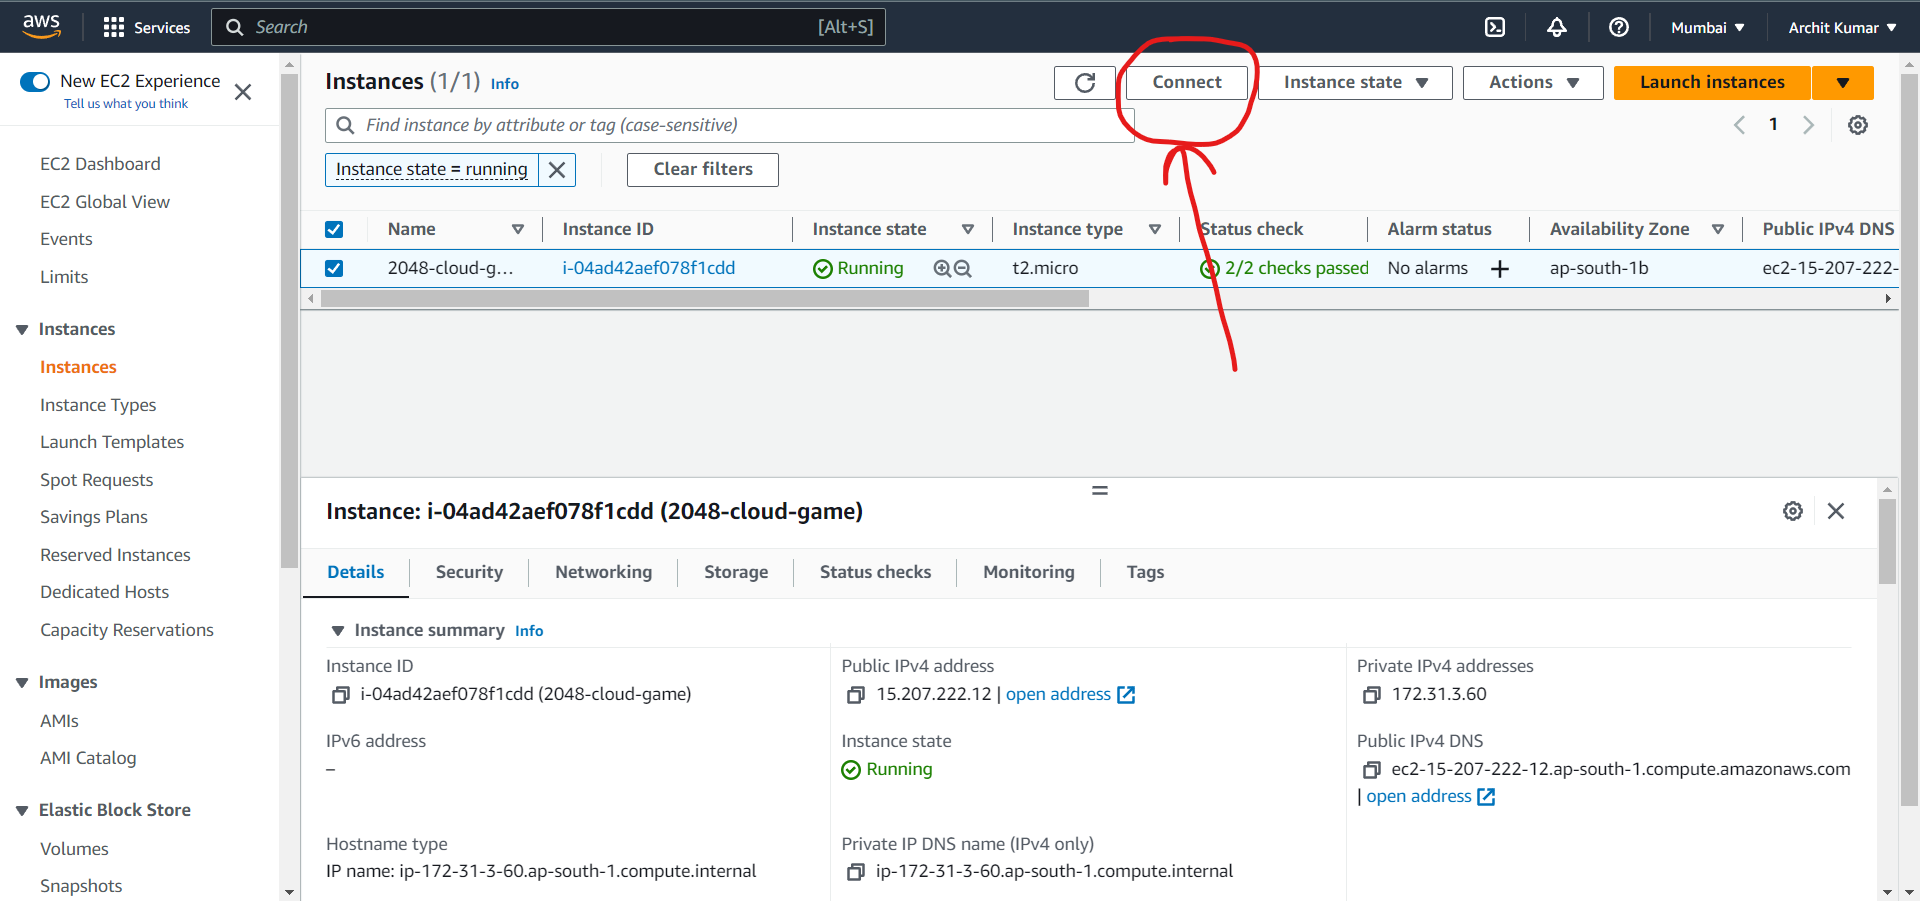
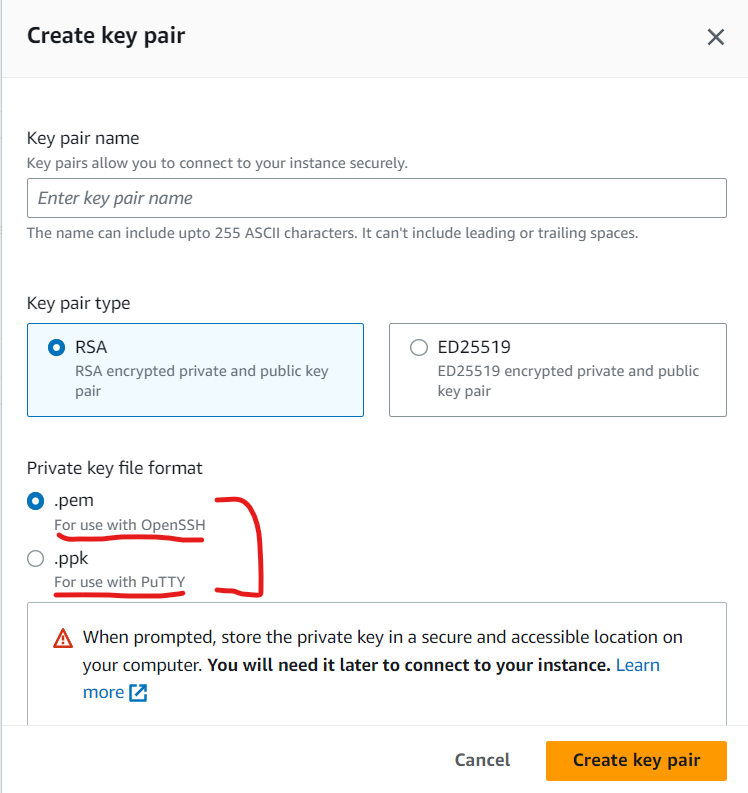
Through any software (ex: Putty). To access the instance through Putty, you need a private key file, which we have to create before launching the instance.
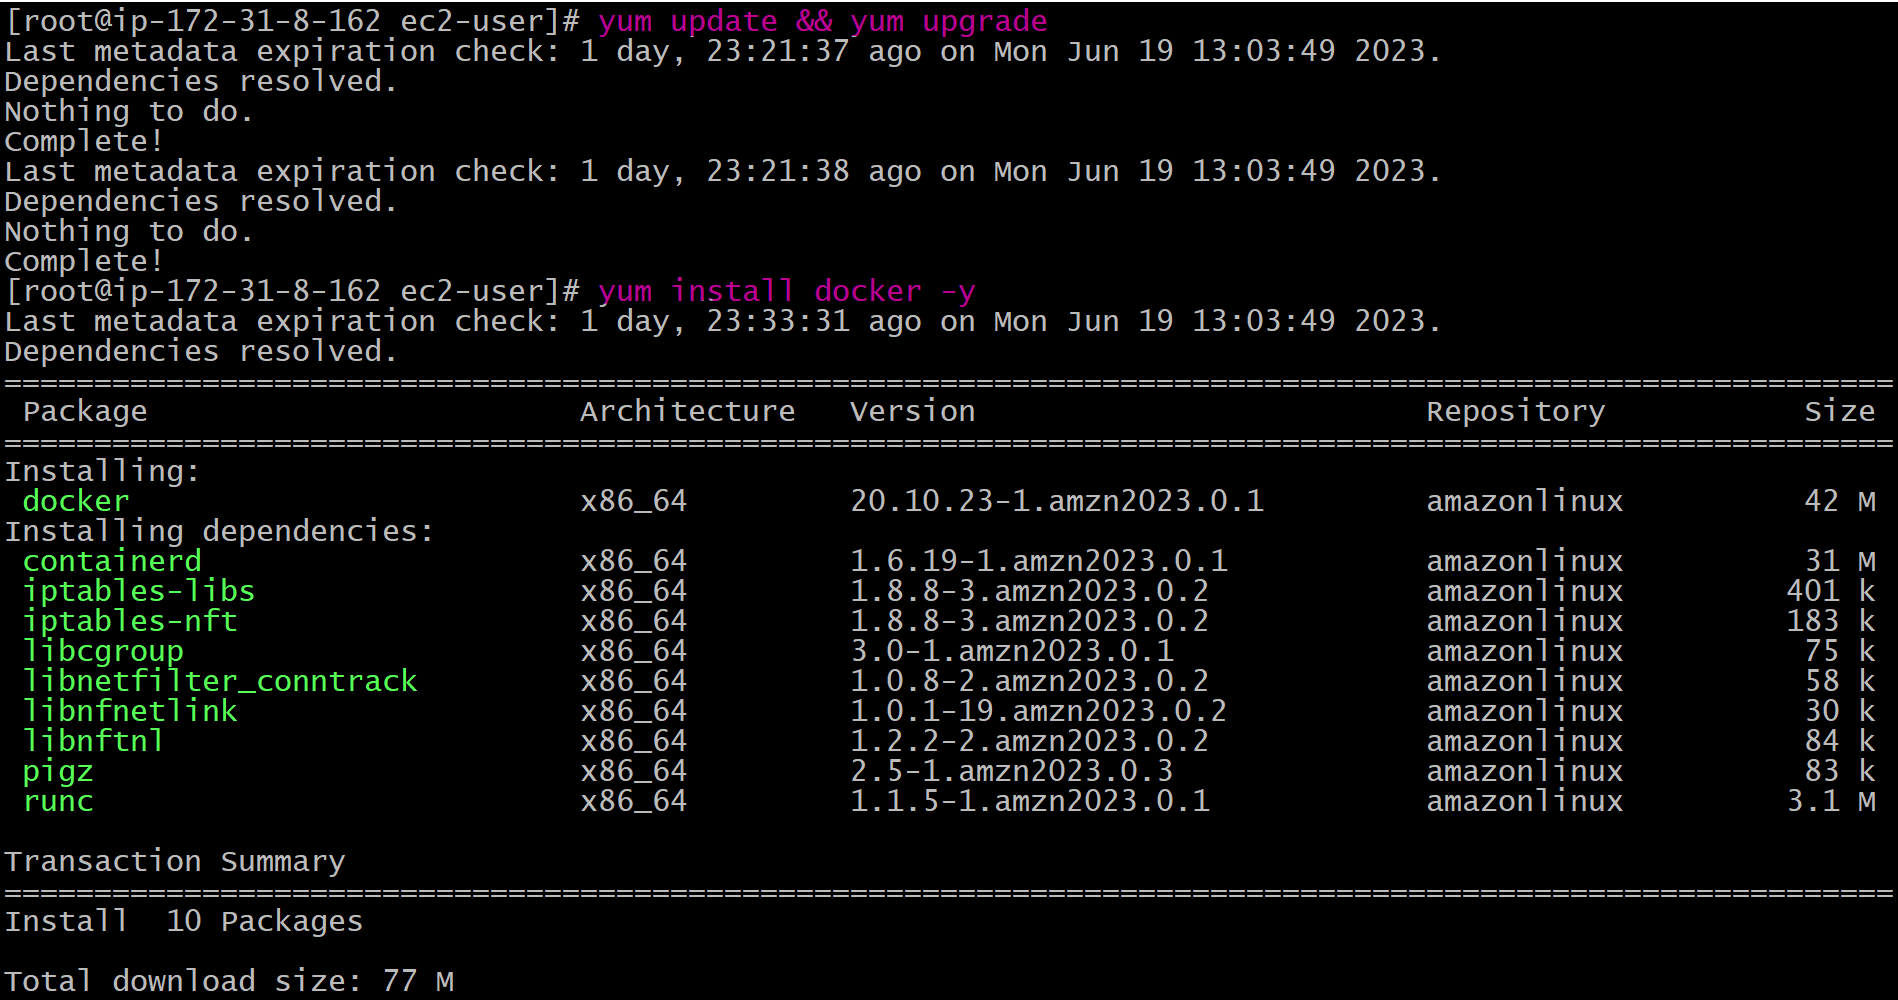
Step 2: Install Docker on the Amazon EC2 Instance and create the Dockerfile
Update and Upgrade the system and then download the Docker on the instance.
Start the docker service


Create the Dockerfile

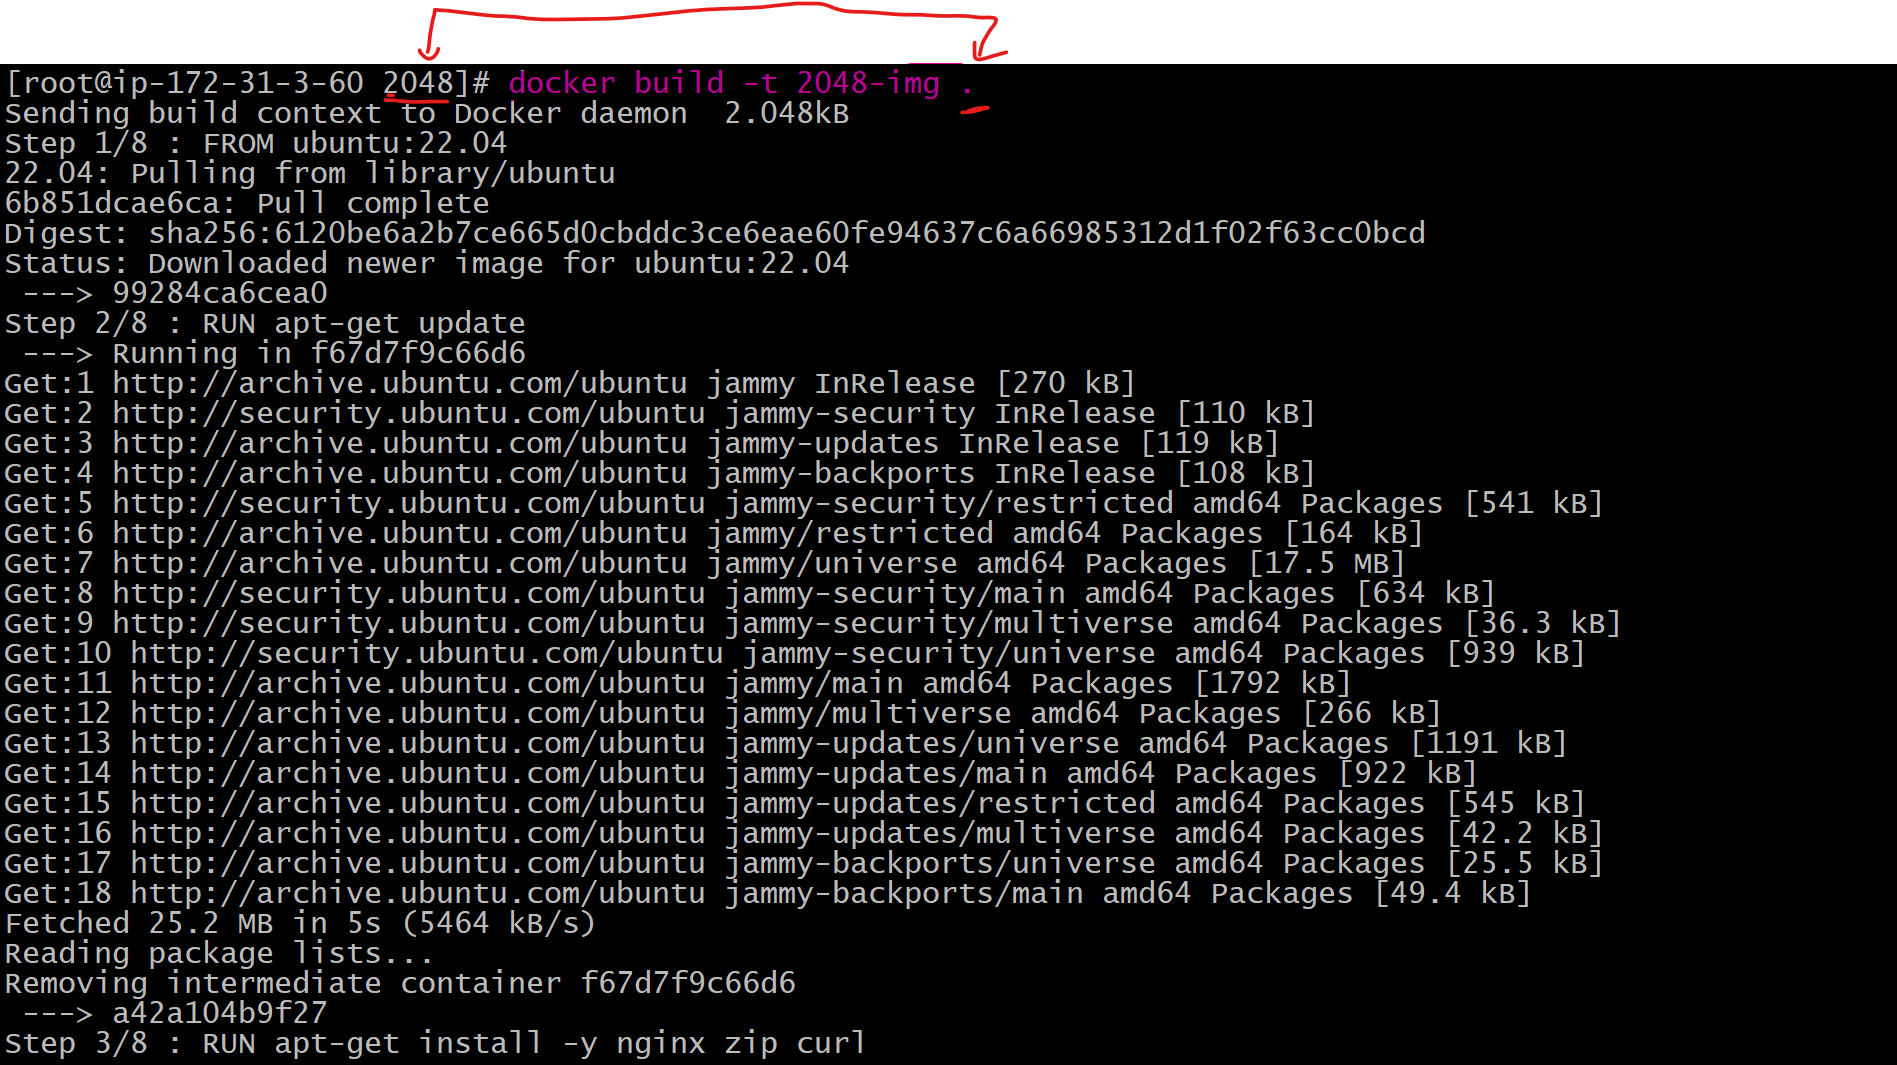
Write the Dockerfile
FROM ubuntu:22.04

RUN apt-get update
RUN apt-get install -y nginx zip curl
RUN echo "daemon off;" >>/etc/nginx/nginx.conf
RUN curl -o /var/www/html/master.zip -L https://github.com/gabrielecirulli/2048/archive/refs/heads/master.zip
RUN cd /var/www/html/ && unzip master.zip && mv 2048-master/* . && rm -rf 2048-master master.zip

EXPOSE 80

CMD ["/usr/sbin/nginx","-c", "/etc/nginx/nginx.conf"]
Explanation of the Docker
FROM ubuntu:22.04: This line sets the base image of the Dockerfile as Ubuntu, with a 22.04 version. All other commands will be implemented based on this image. This command will automatically fetch/pull the image from the DockerHub (The Registry).RUN apt-get update: This command is used to update all the packages present inside the Ubuntu image.RUN apt-get install -y nginx zip curl: In this command, we have installed the "nginx", "zip" and "curl" packages on the Ubuntu image. The'-y'flag automatically confirms the installation.RUN echo "daemon off;" >>/etc/nginx/nginx.conf: In this command, the text "daemon off" will be echoed or added in the nginx.conf file. This is a configuration setting that prevents the Nginx server to run in the background.RUN curl -o /var/www/html/master.zip -Lhttps://github.com/gabrielecirulli/2048/archive/refs/heads/master.zip: This line downloads the source code of the 2048 game as, the "master.zip file", from the specified GitHub link, with the help of the "curl" command. This master.zip file is stored in /var/www/html/.RUN cd /var/www/html/ && unzipmaster.zip&& mv 2048-master/* . && rm -rf 2048-mastermaster.zip: In this line, the current directory (cd) is changed to [/var/www/html]. After getting into the directory, the master.zip file is unzipped, and all the contents of the 2048-master directory are moved to the current directory (/var/www/html). After this, the "2048-master directory" and the "master.zip file" are removed.EXPOSE 80: This command is used to expose port number 80, so that, the docker container can listen on this port, and we all can access the container publically.CMD ["/usr/sbin/nginx","-c", "/etc/nginx/nginx.conf"]: This command is executed during the creation of the Docker container, from the Docker image.Now, let's break down each component:
->
"/usr/sbin/nginx": This specifies the executable command that will run inside the container. In this case, it is the nginx command that will run.->
"-c": This flag specifies the configuration settings. It is an argument passed to the nginx command.->
"/etc/nginx/nginx.conf": This is the path to the configuration file for nginx. It is passed as an argument to the nginx command with the '-c' flag.
Now, when the container is created from the Docker image, the default command executed inside the container will be [/usr/sbin/nginx" -c /etc/nginx/nginx.conf]. This will start the Nginx web server using the specified configuration file.
Step3: Create the Docker image, from the Dockerfile

Step4: Create the Docker container, from the Docker image
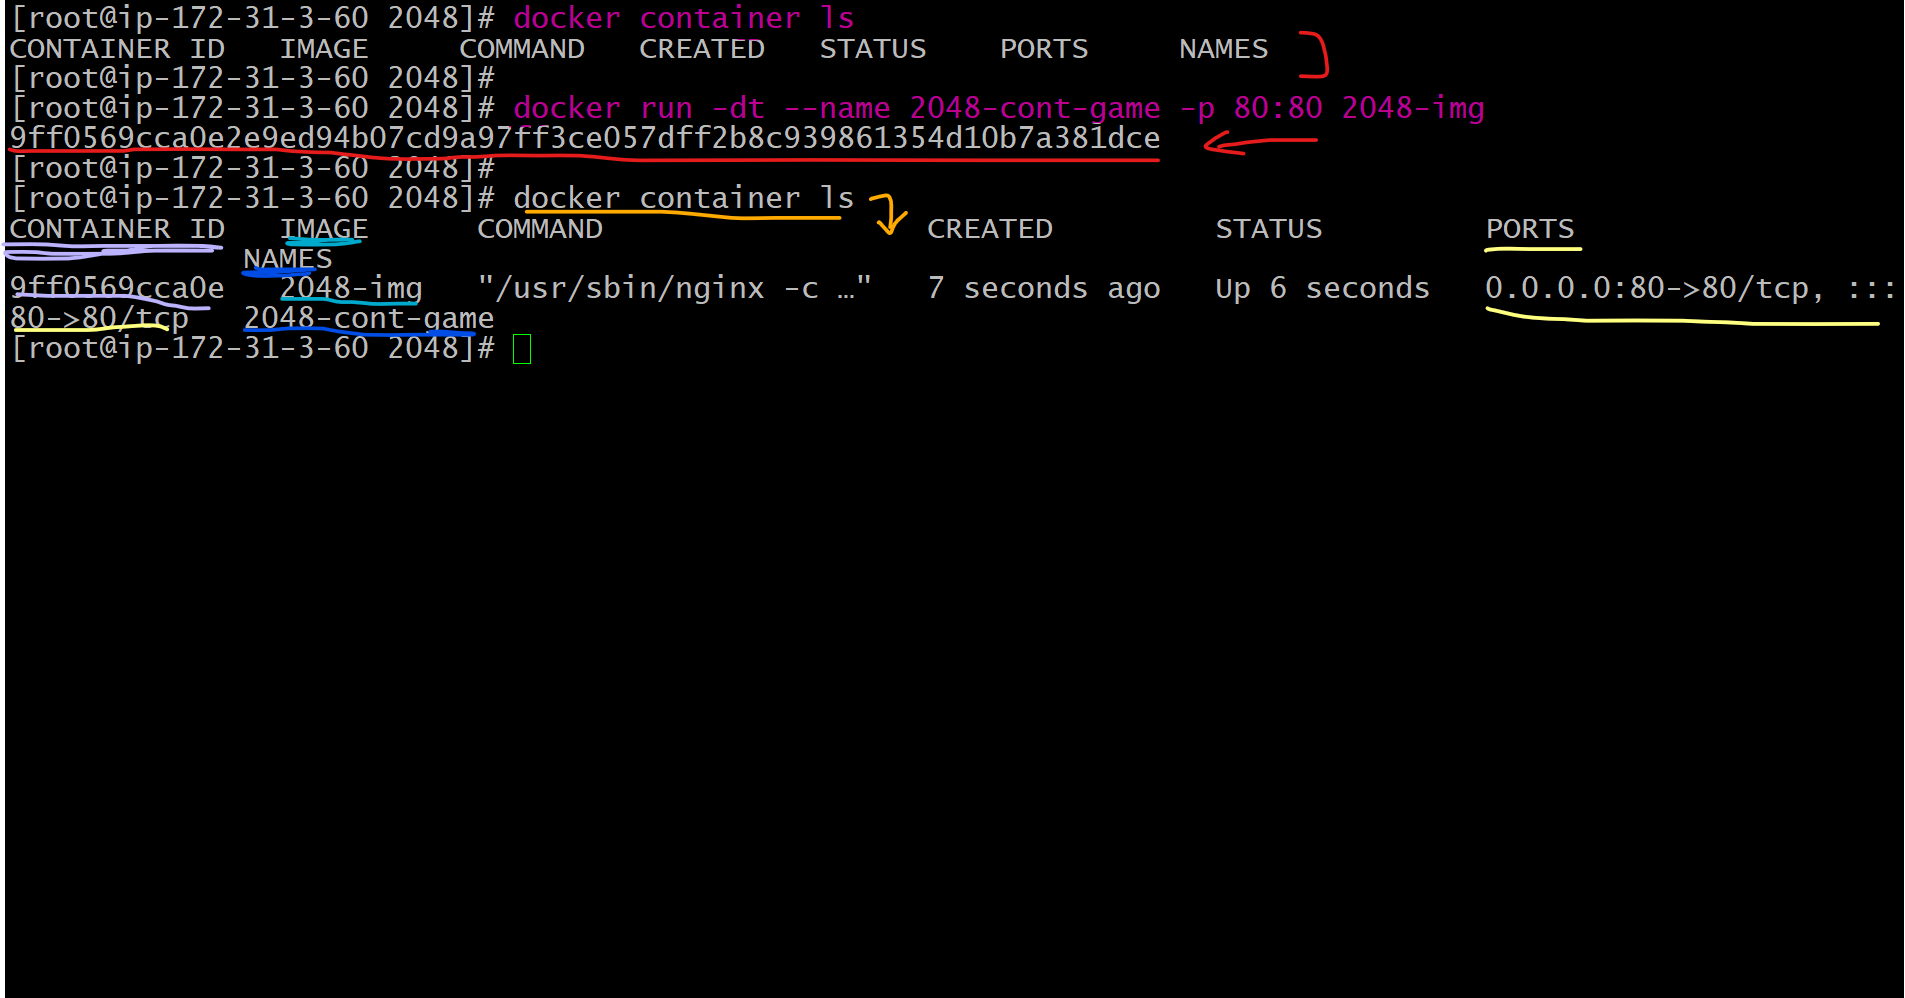
docker run -dt --name 2048-cont-game -p 80:80 2048-img: This is the command to create the Docker container.
Let's break it down:
"-dt": This flag means the container will run but in the detached mode."--name 2048-cont-game": This line tells about the name of the container."-p 80:80": This line tells about the Docker Port Mapping.'-p'flag specifies the port number, and80:80is the port mapping => [Mapping of Host port to the Container port]."2048-img": This is the Docker image from which the container is created.
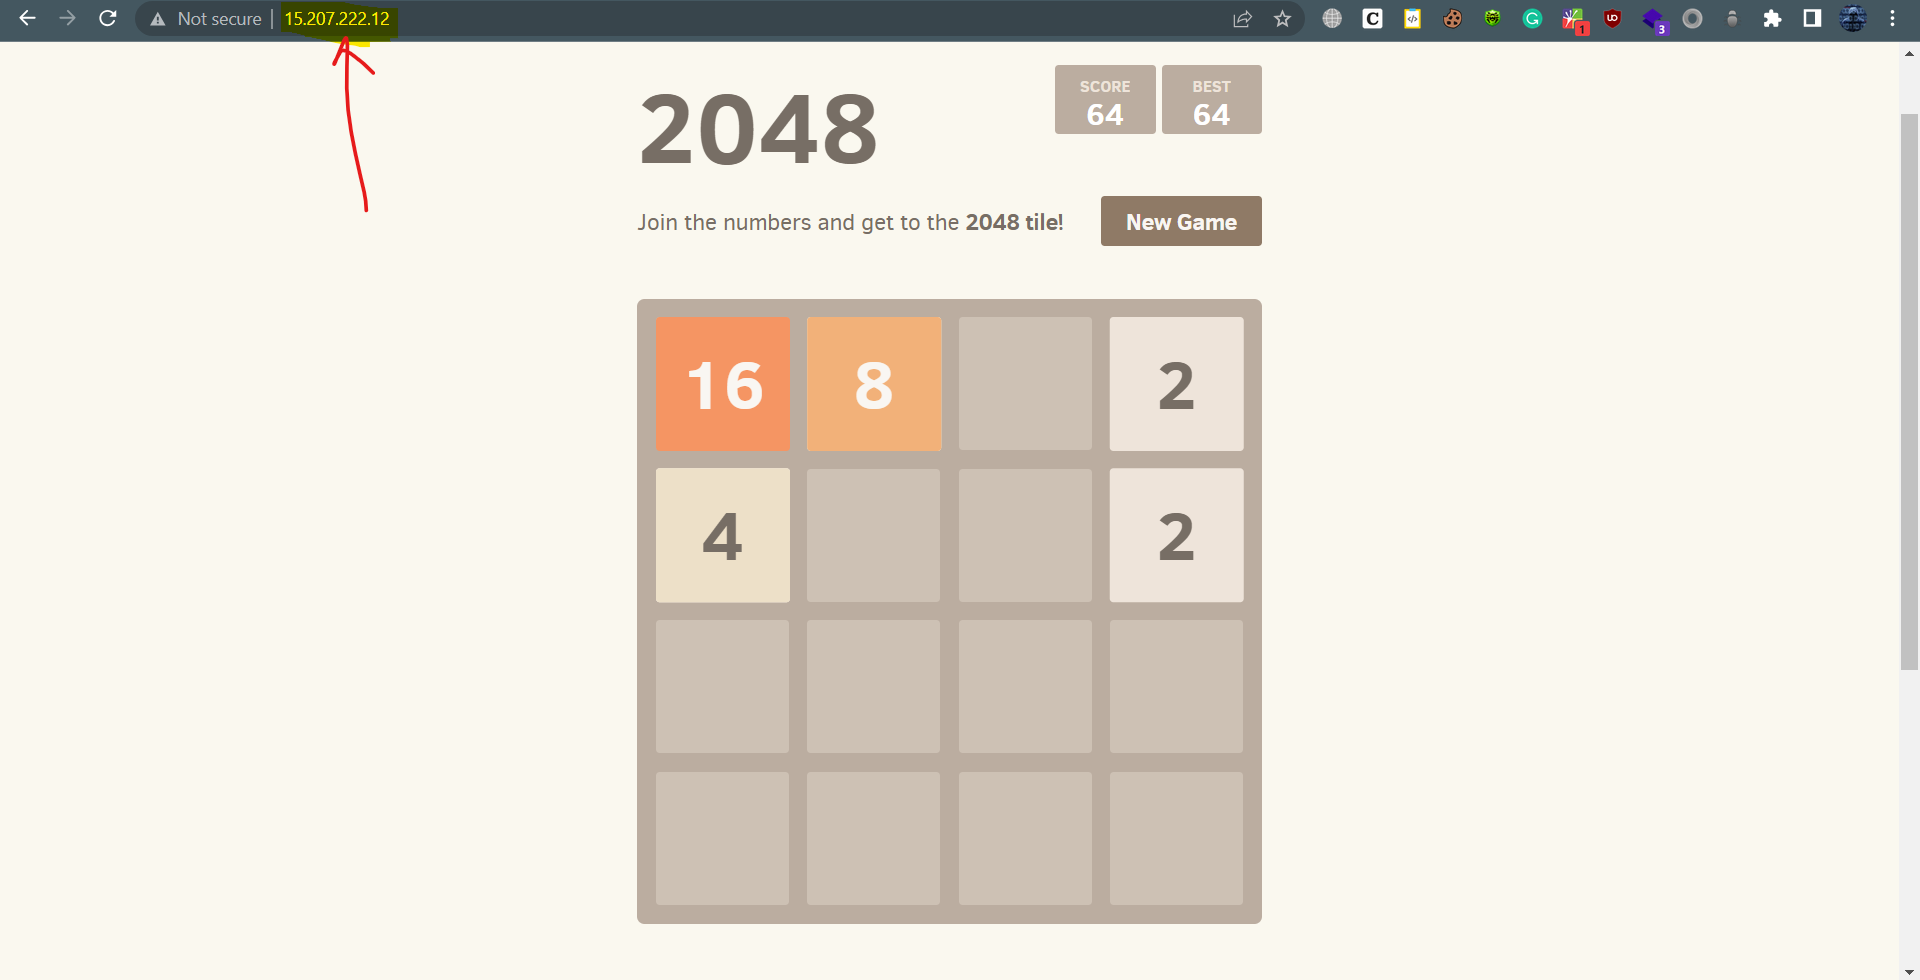
Now, as the container is running, and the game is running inside the container, so to test the game, copy the Public IP of your EC2-instance and paste it into your browser and press enter.
Step5: Deploying the Application on Amazon Elastic Beanstalk
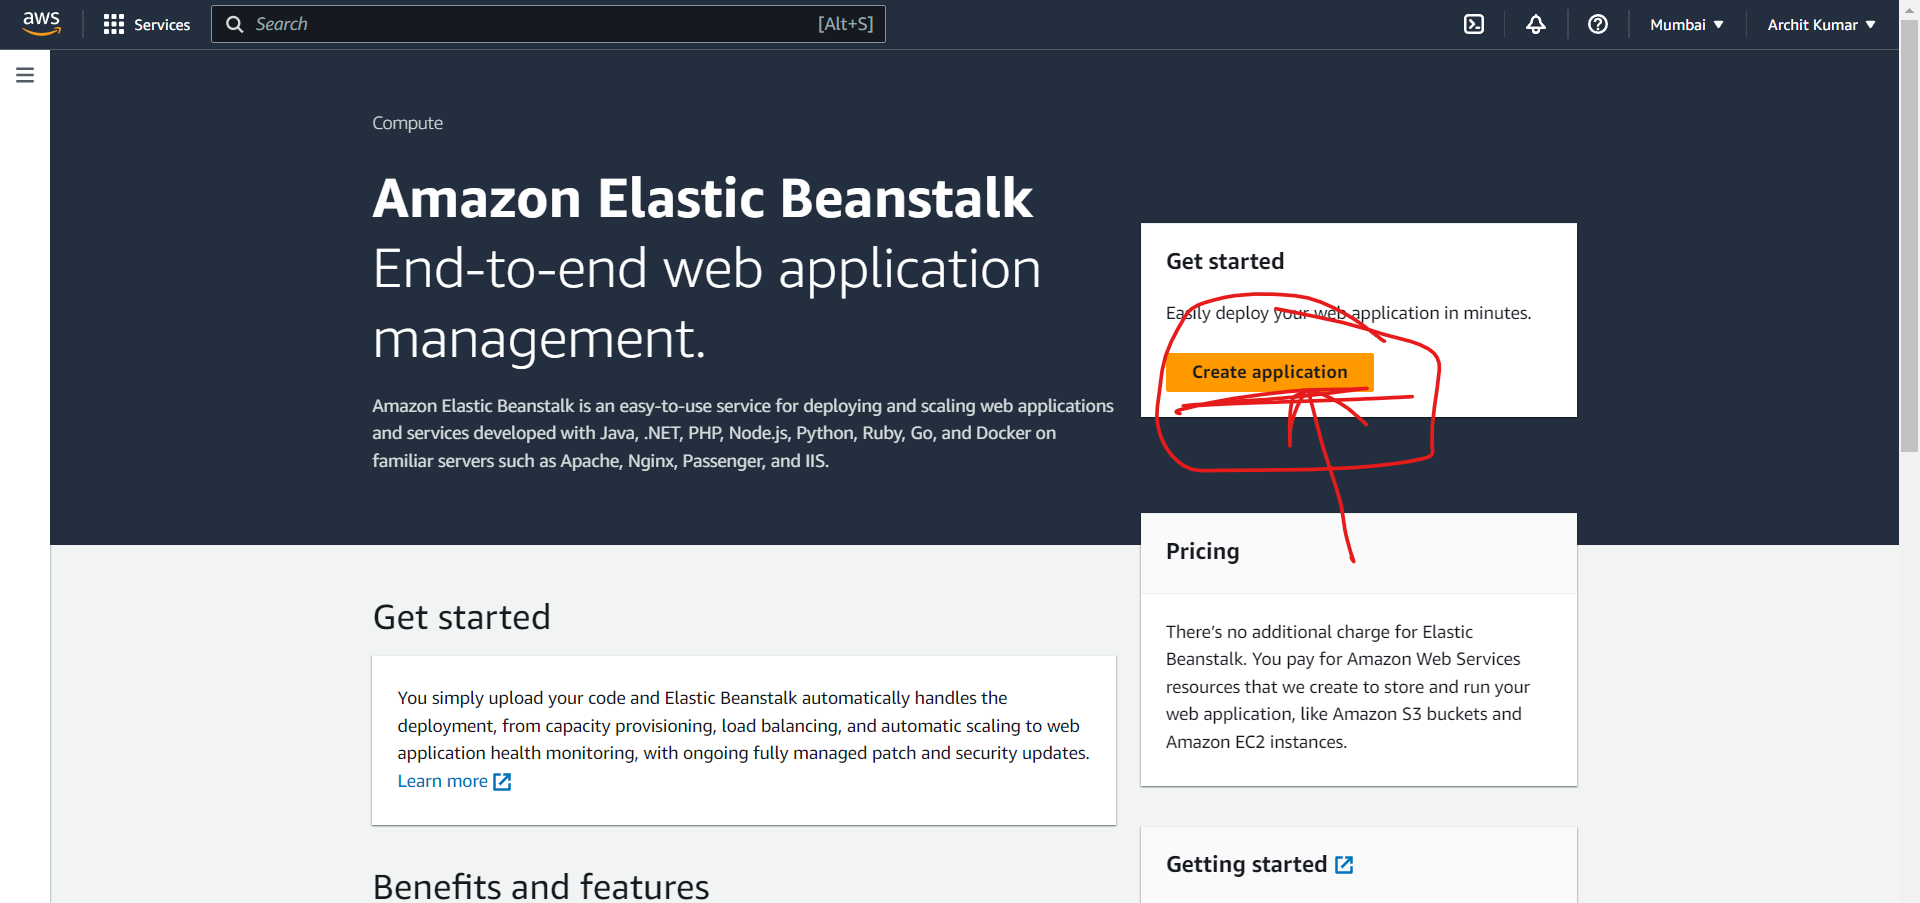
Go to amazon elastic beanstalk and hit "Create Application".
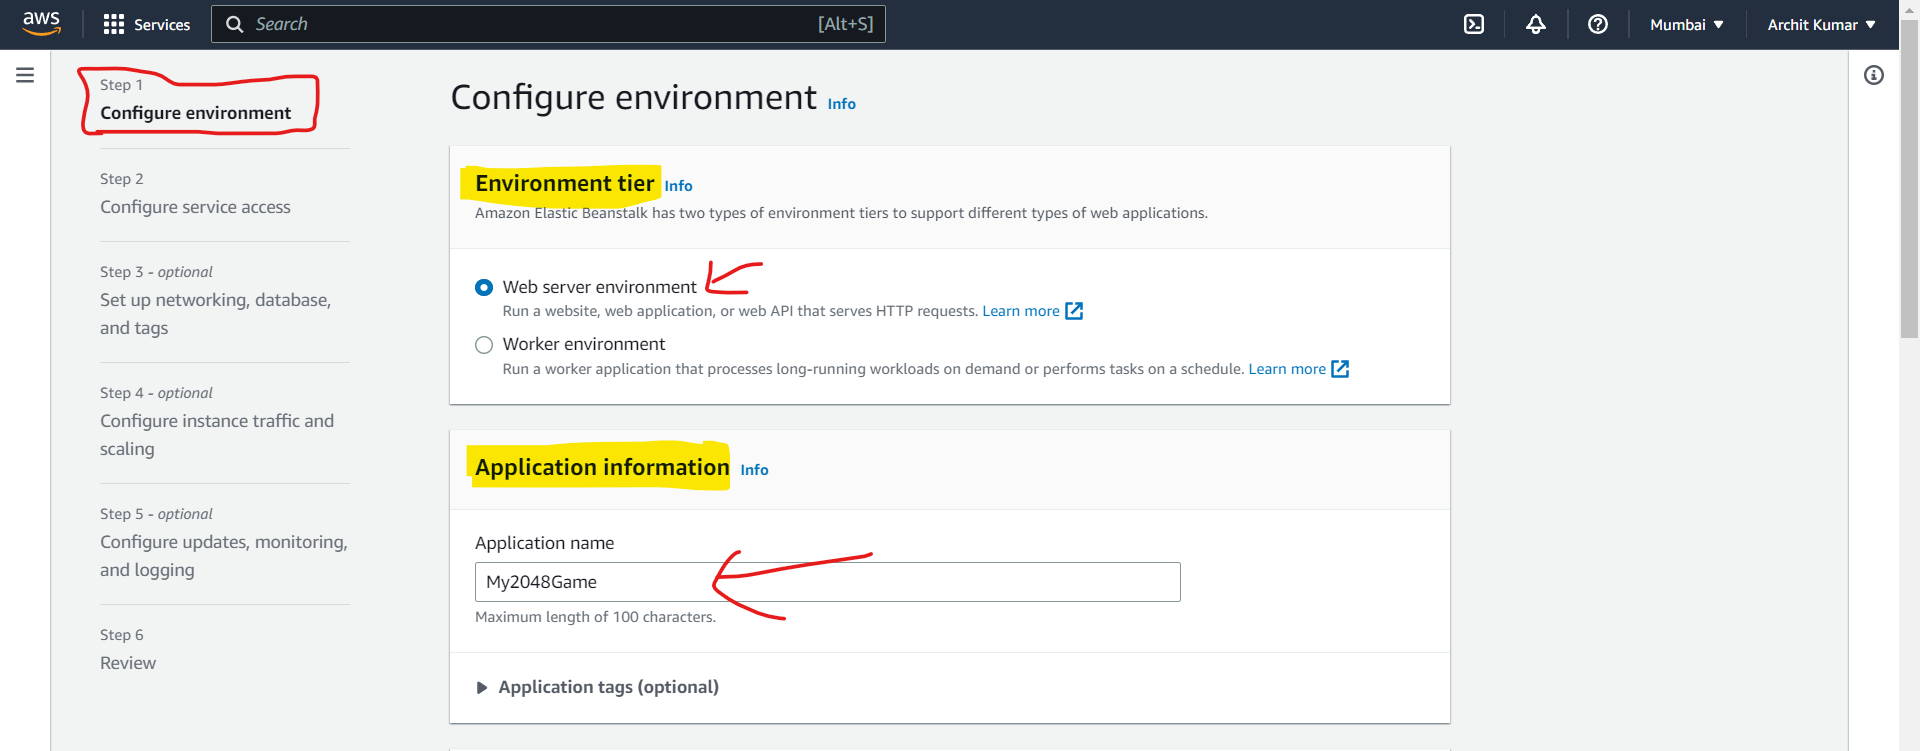
Now, once you give your Application Name, the Environment Name will be automatically generated.

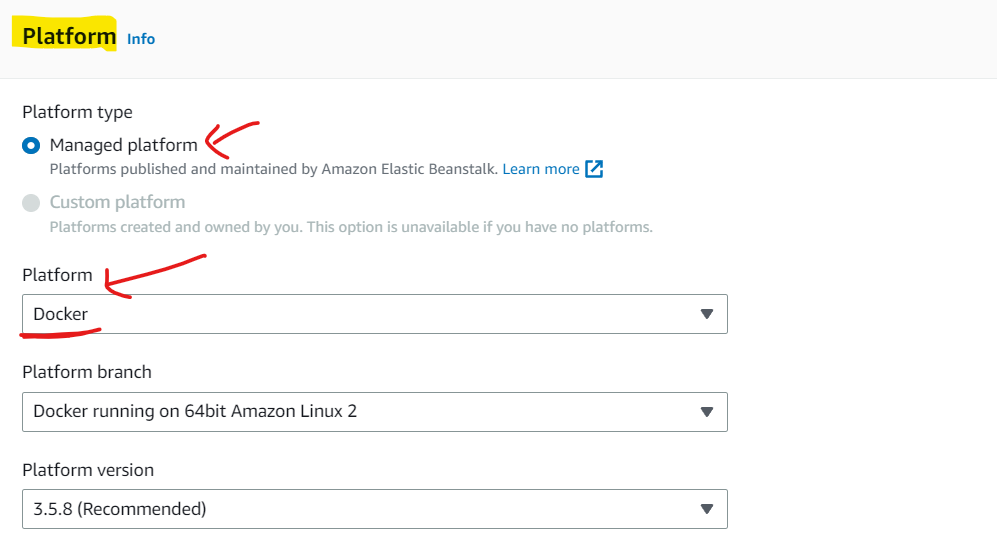
Choose the platform as Docker.
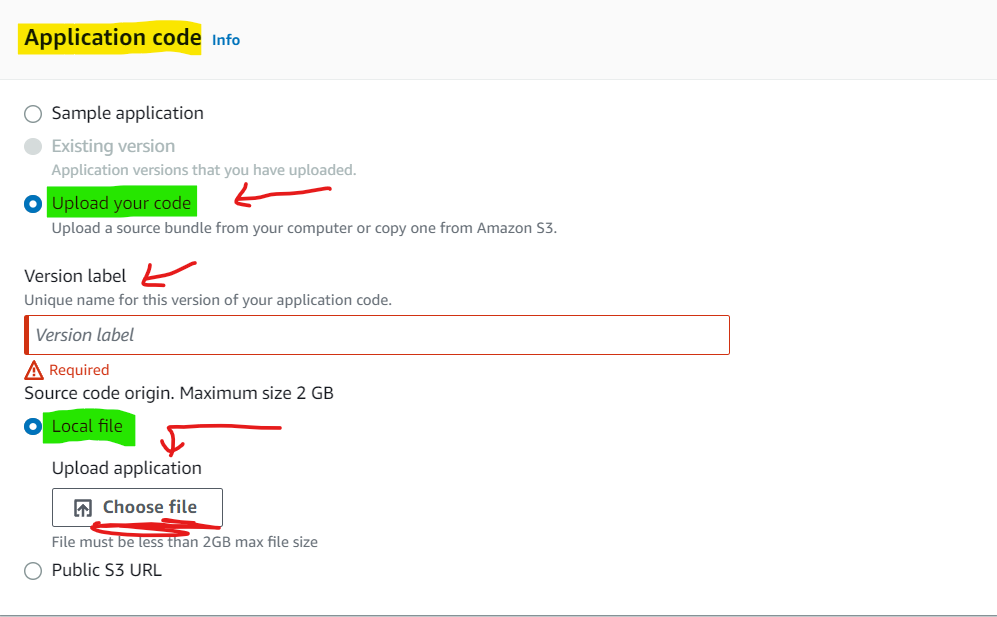
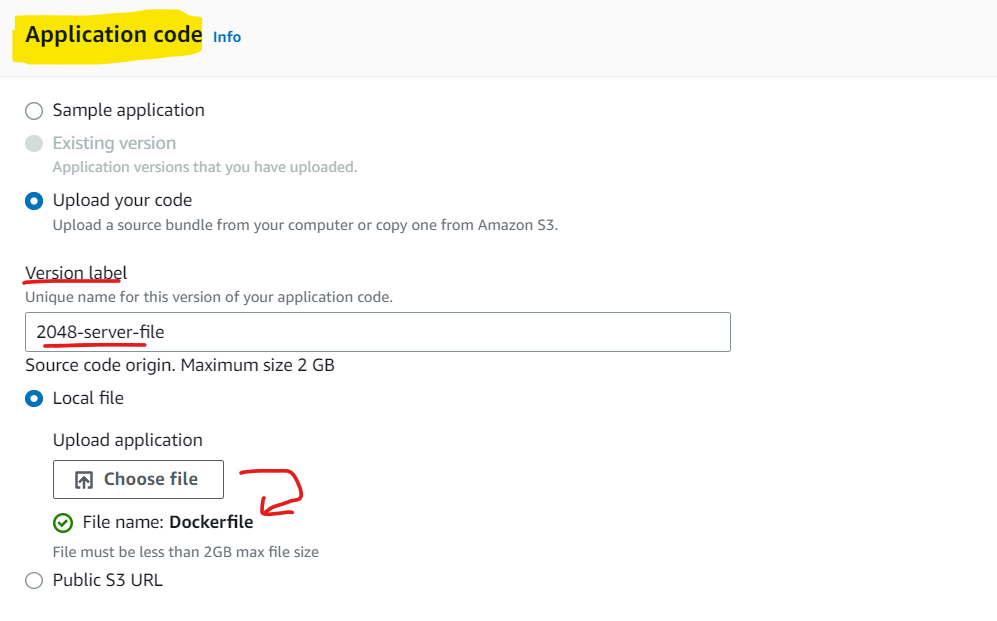
After choosing the Platform, we have to upload the Application code (i.e. your Dockerfile). But to upload the Dockerfile on Amazon elastic beanstalk, we need to have the Dockerfile on our local machine.
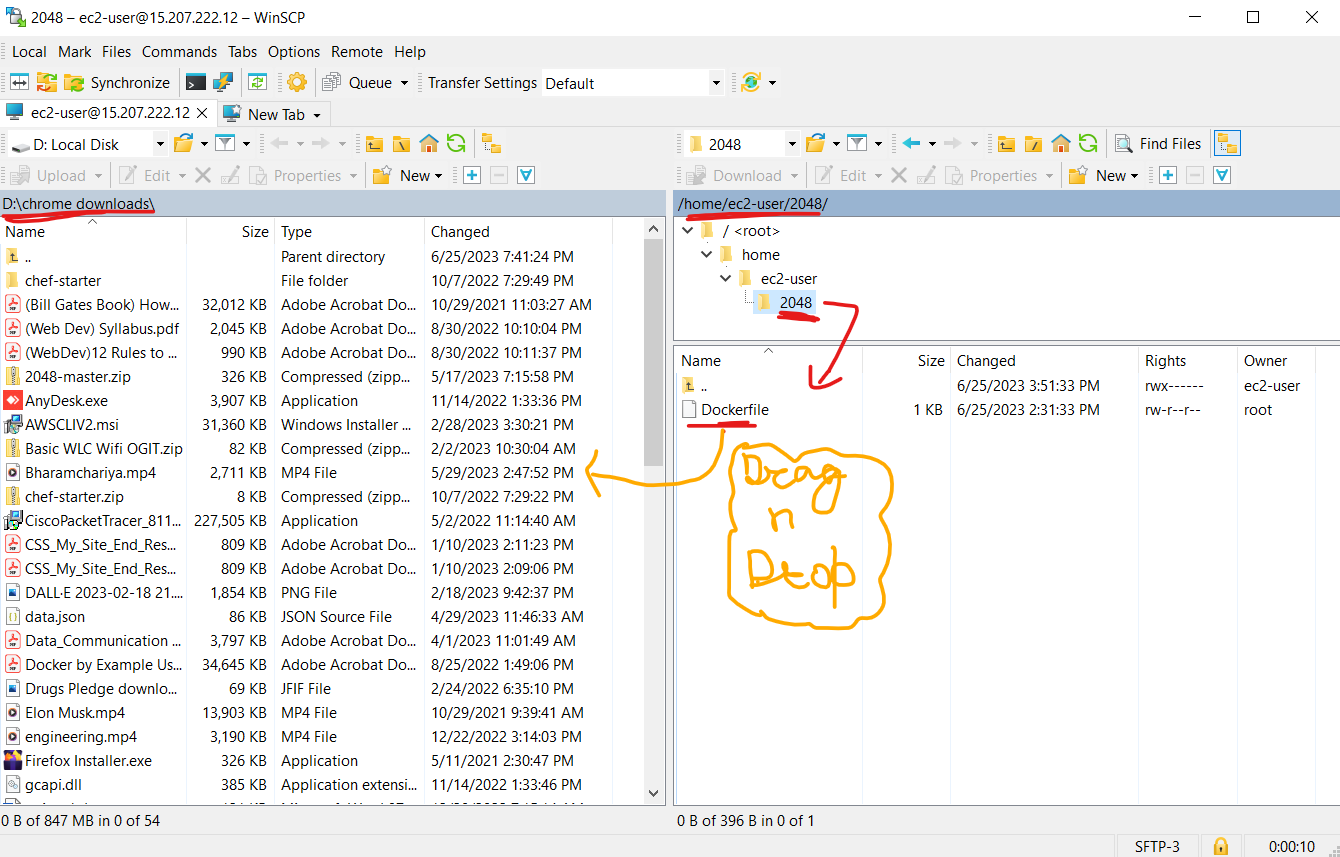
We can do this either manually via the "scp" command or by a software called WinSCP.
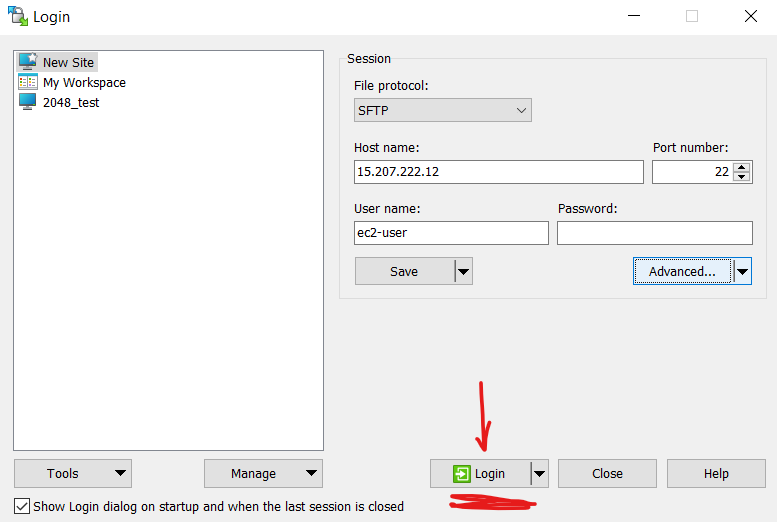
Open WinSCP software, and you'll see the dashboard to log in.
Click on New Site
In Hostname, put your EC2-Instance's Public IP
In Username, write "ec2-user"
Note that the Port number should be 22 for ssh.
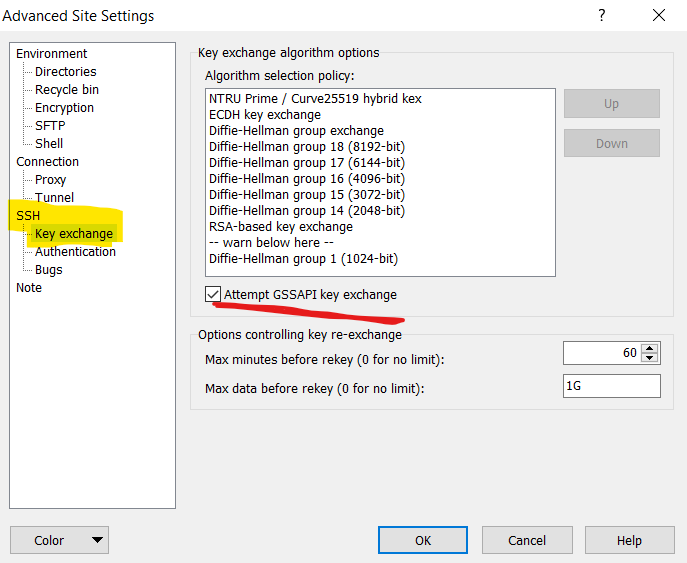
After this, click on Advanced settings

After going in Advance settings, go on SSH (Key exchange) and check this box.
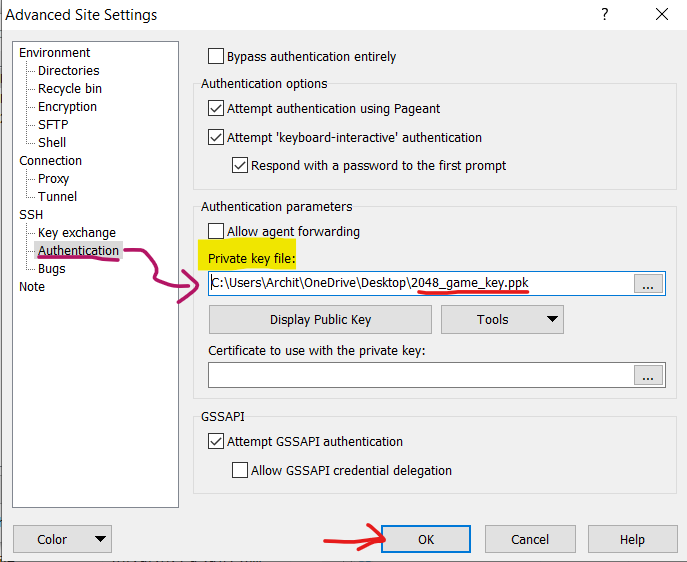
After this, go to the Authentication tab and enter the .ppk key file, which we downloaded while launching the instance.
Now, press Log in, and your machine's content will be visible and we can easily drag and drop the Dockerfile (present in the cloud) to our local machine.
Now, go back to your Amazon Elastic Beanstalk console and upload your Dockerfile.
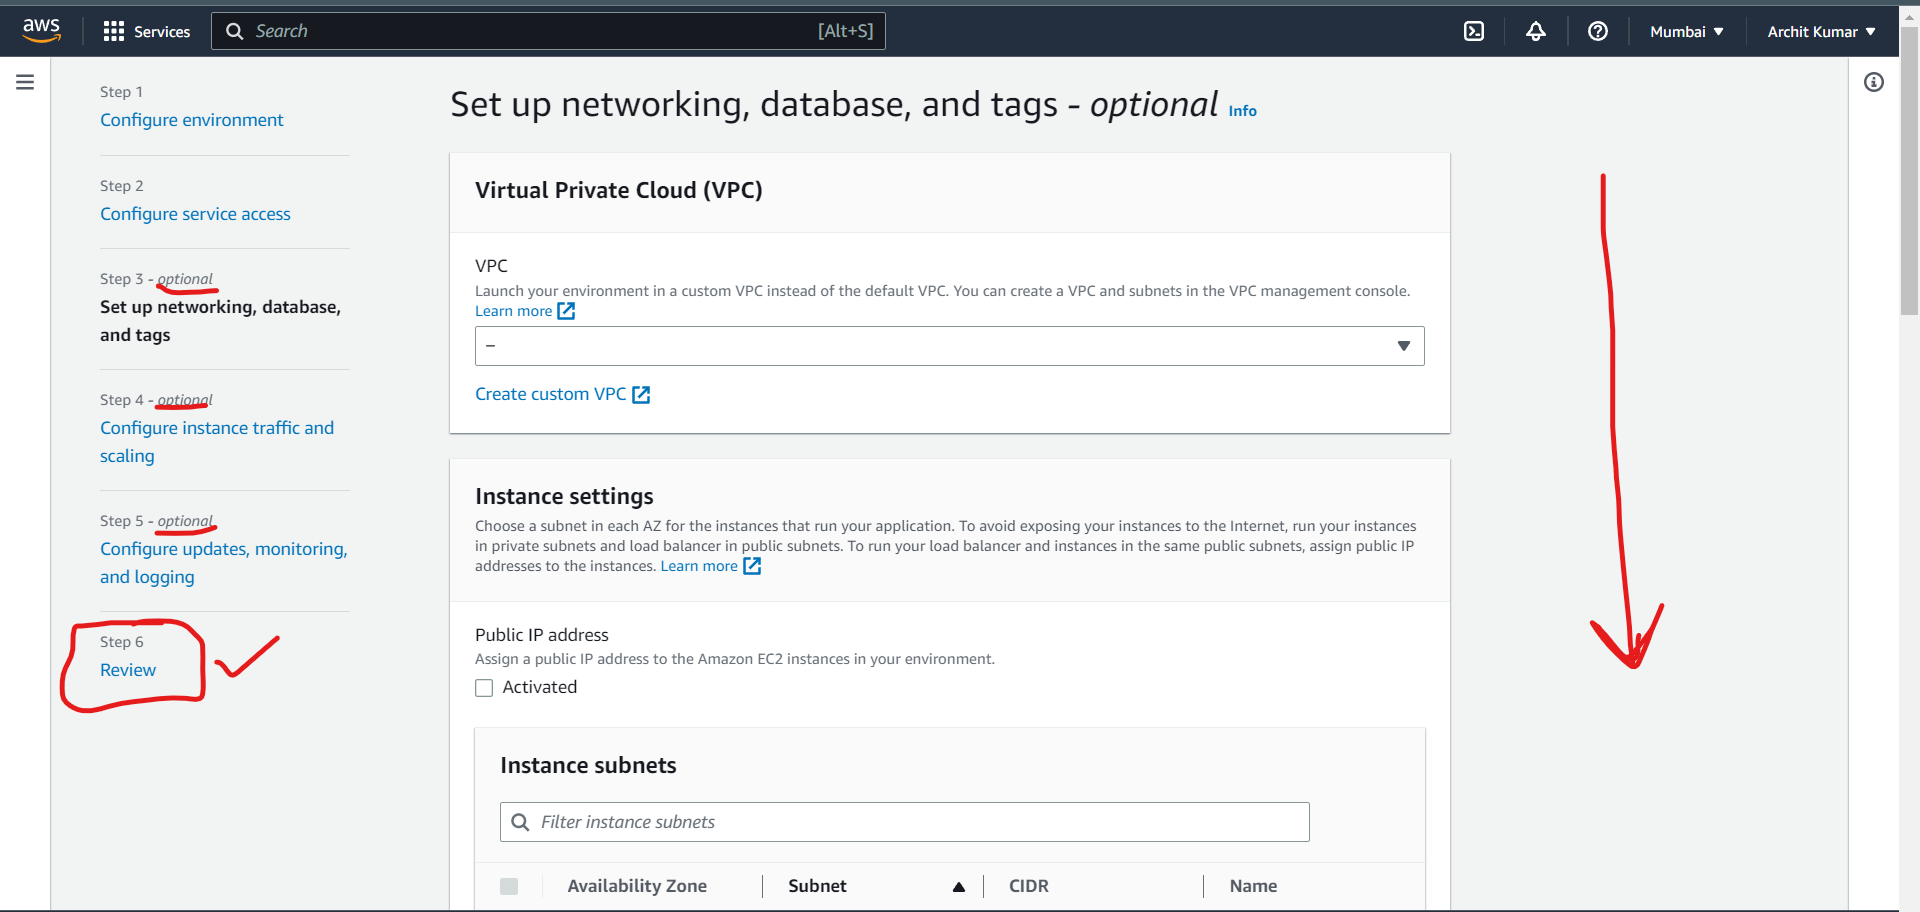
Rest Everything leave it as default and click Next...👇🏻👇🏻👇🏻
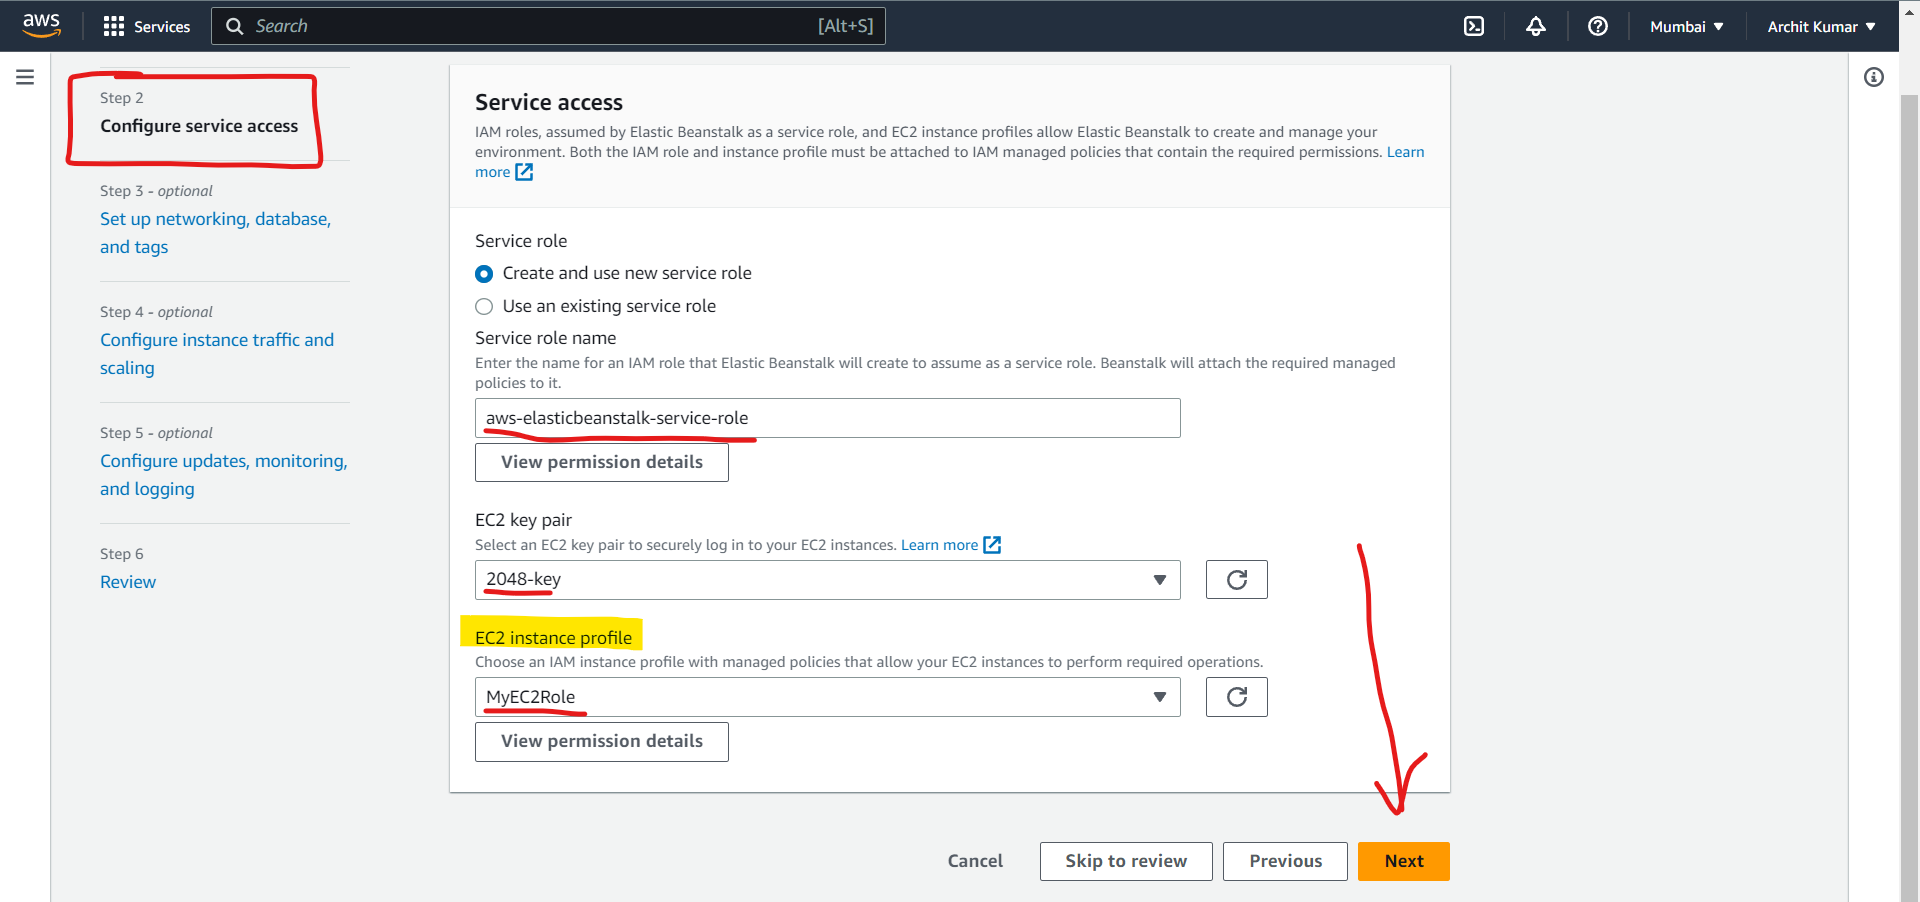
Now, here we can see that Step 2 is not optional as other steps, therefore, if we have to proceed further, we have to perform "Configure service access".
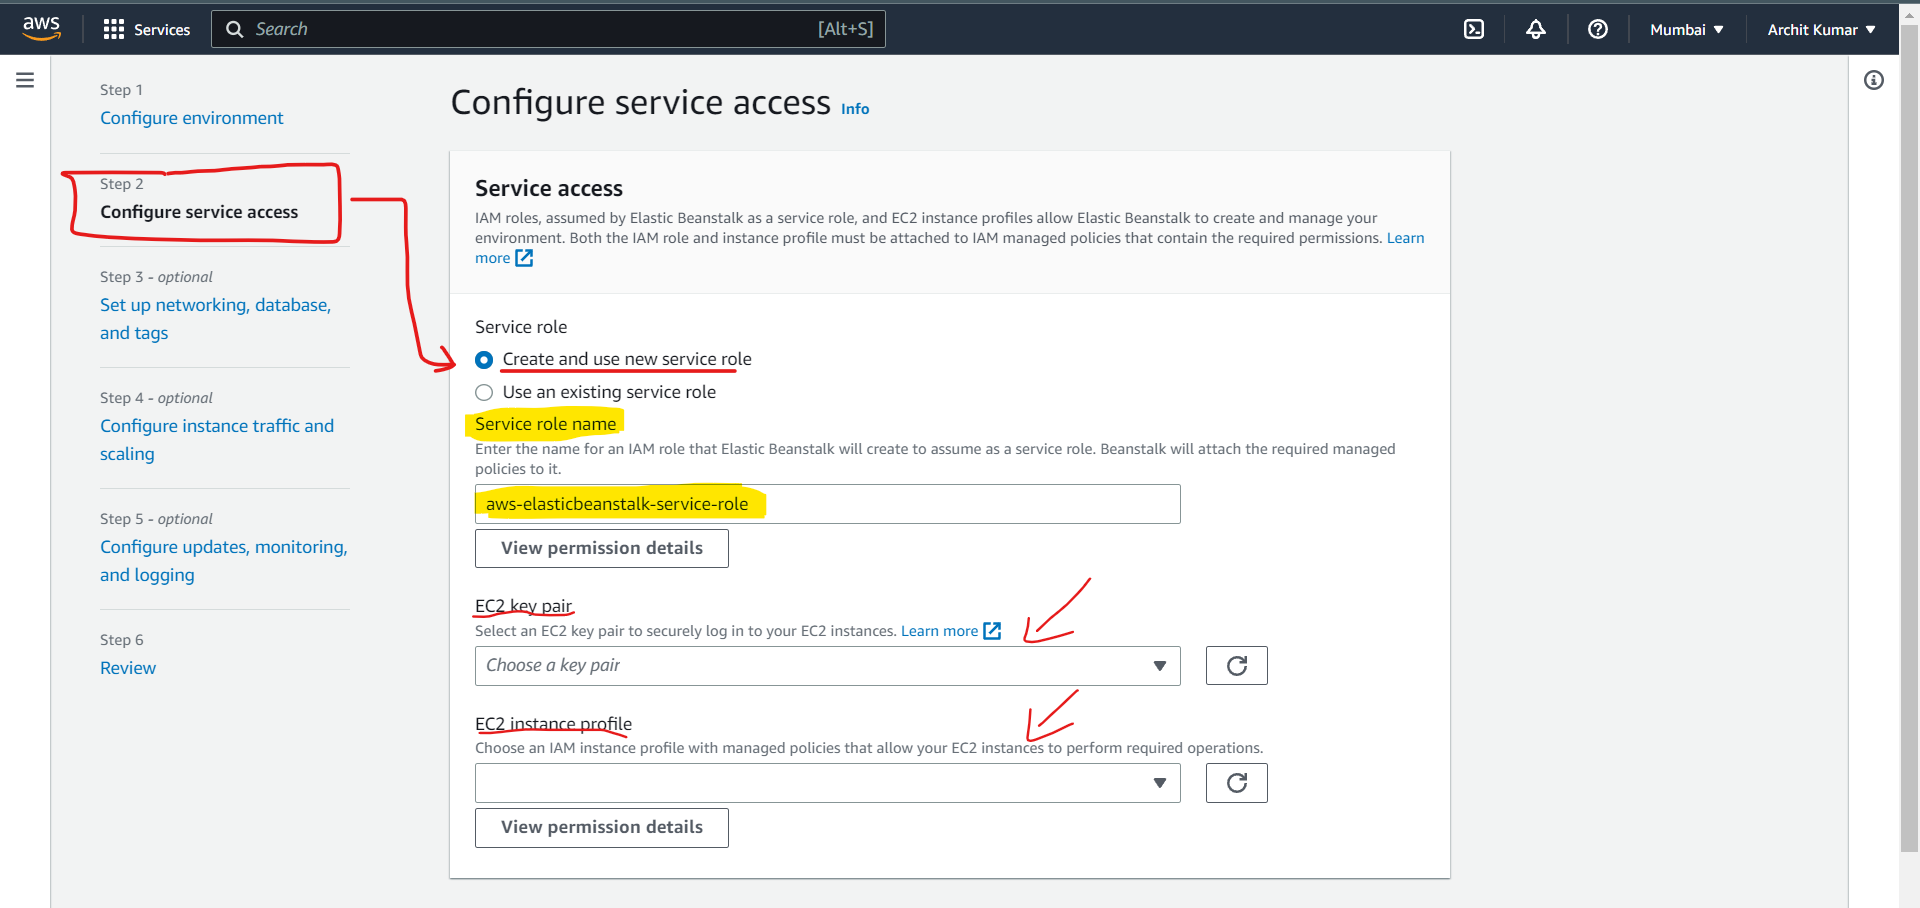
In this, we can choose "EC2 key pair", which is the .pem key file, that we have downloaded while launching the Instance, but to choose the EC2 Instance profile, we have to create an EC2 role.
NOTE: Don't click on "Skip to review", the application will not be deployed.
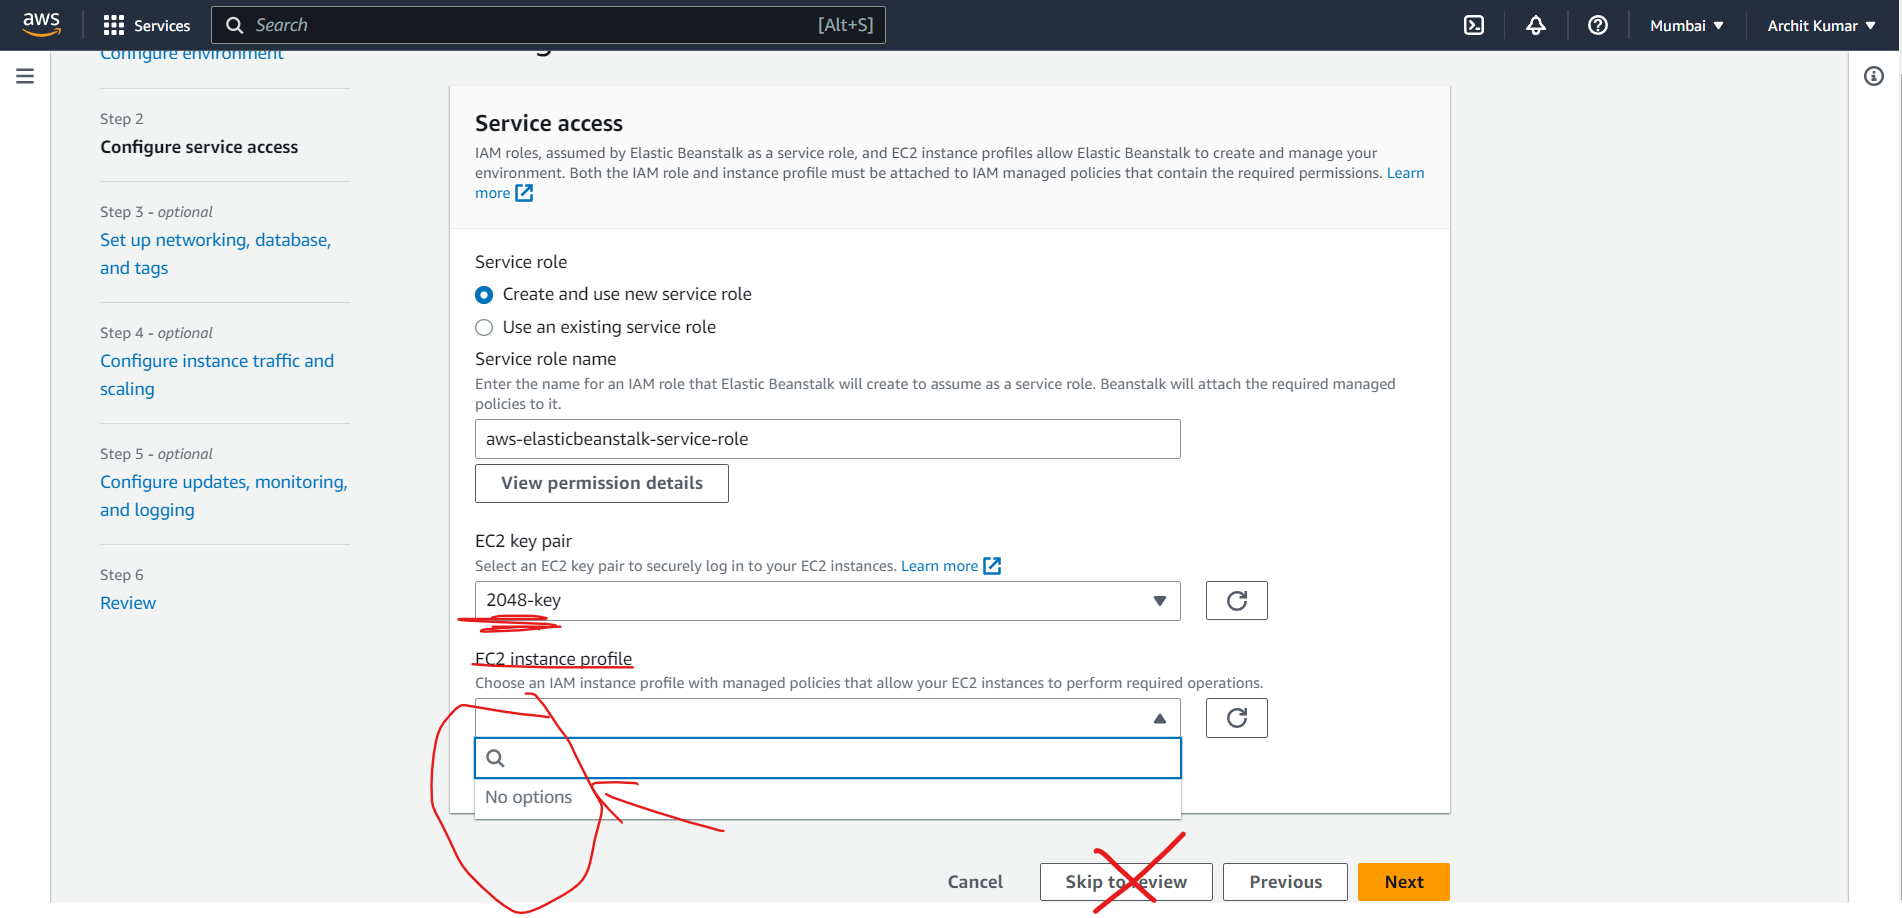
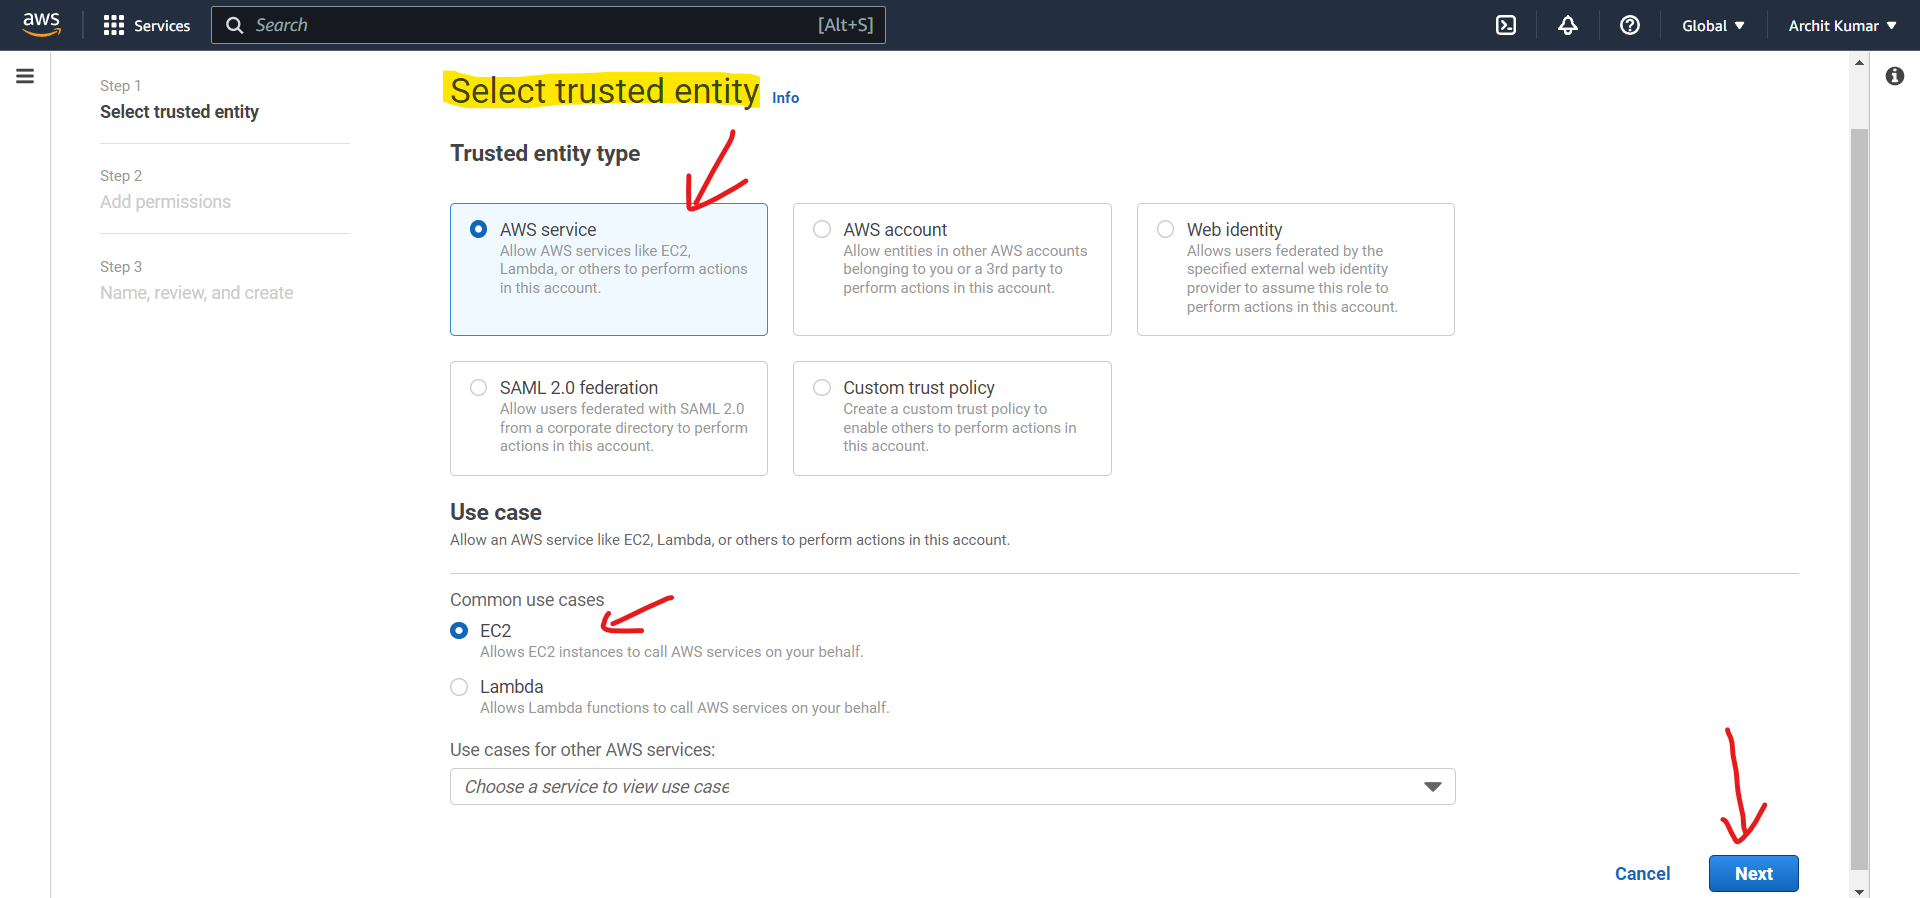
To create Roles, we have to go to AWS IAM service (Identity and Access Management).
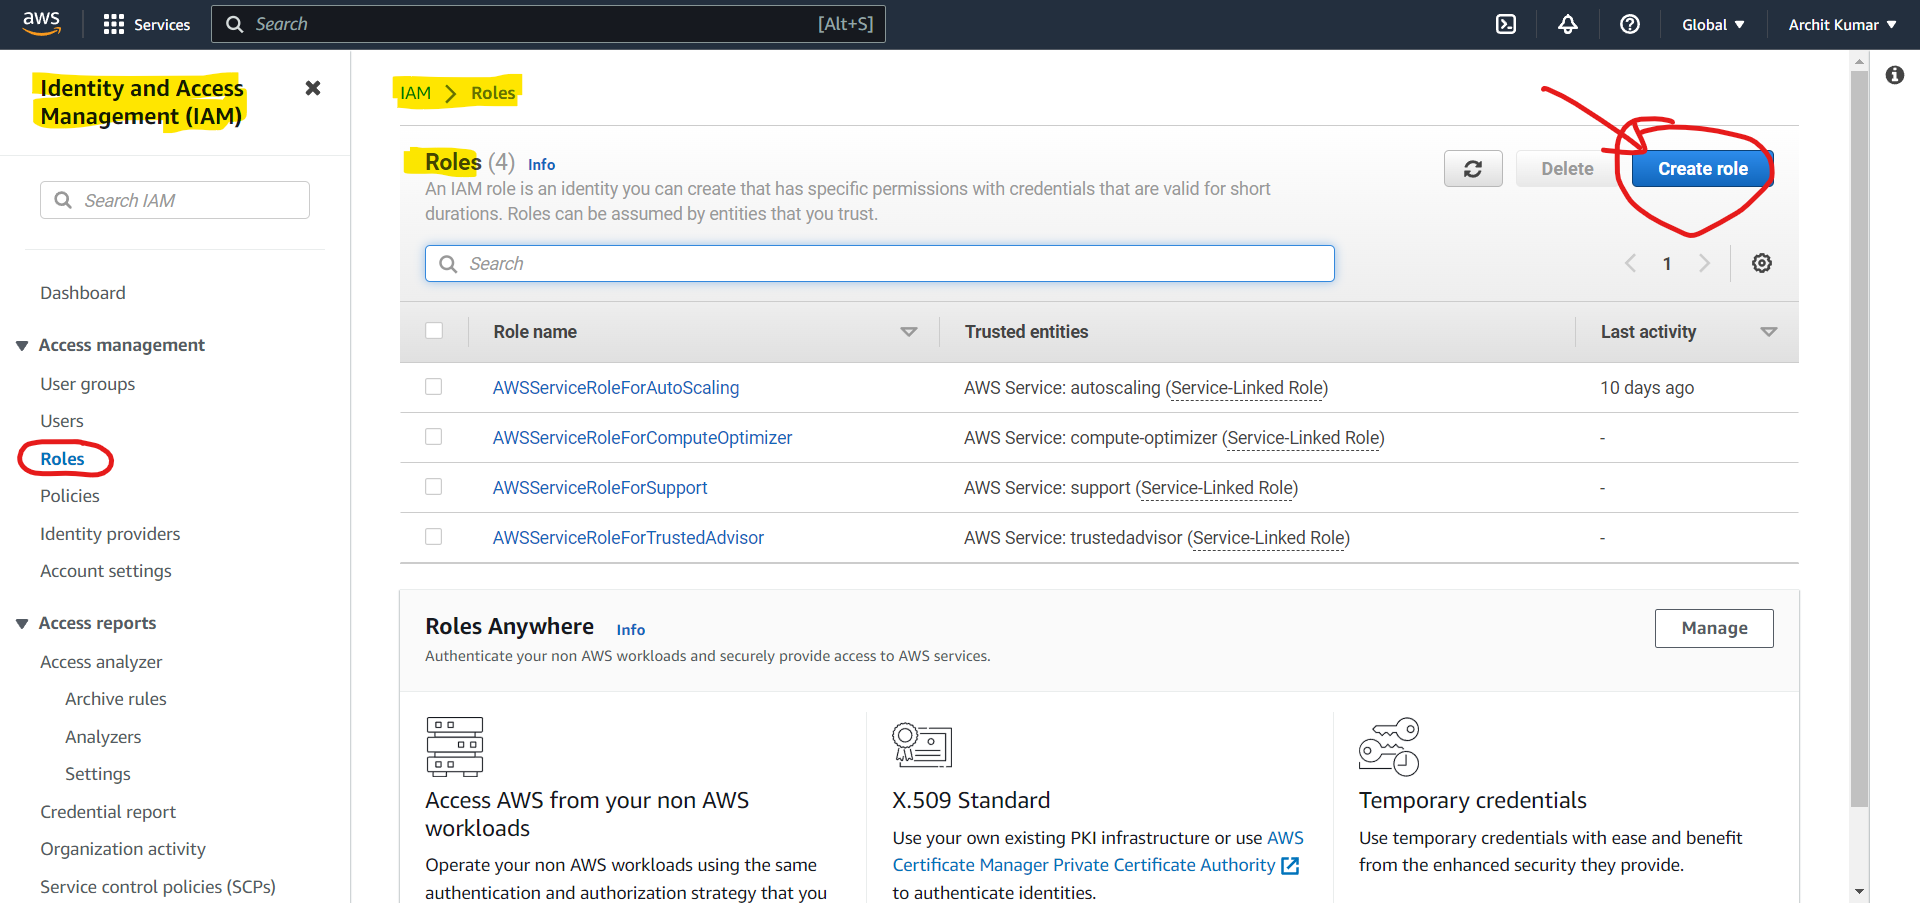
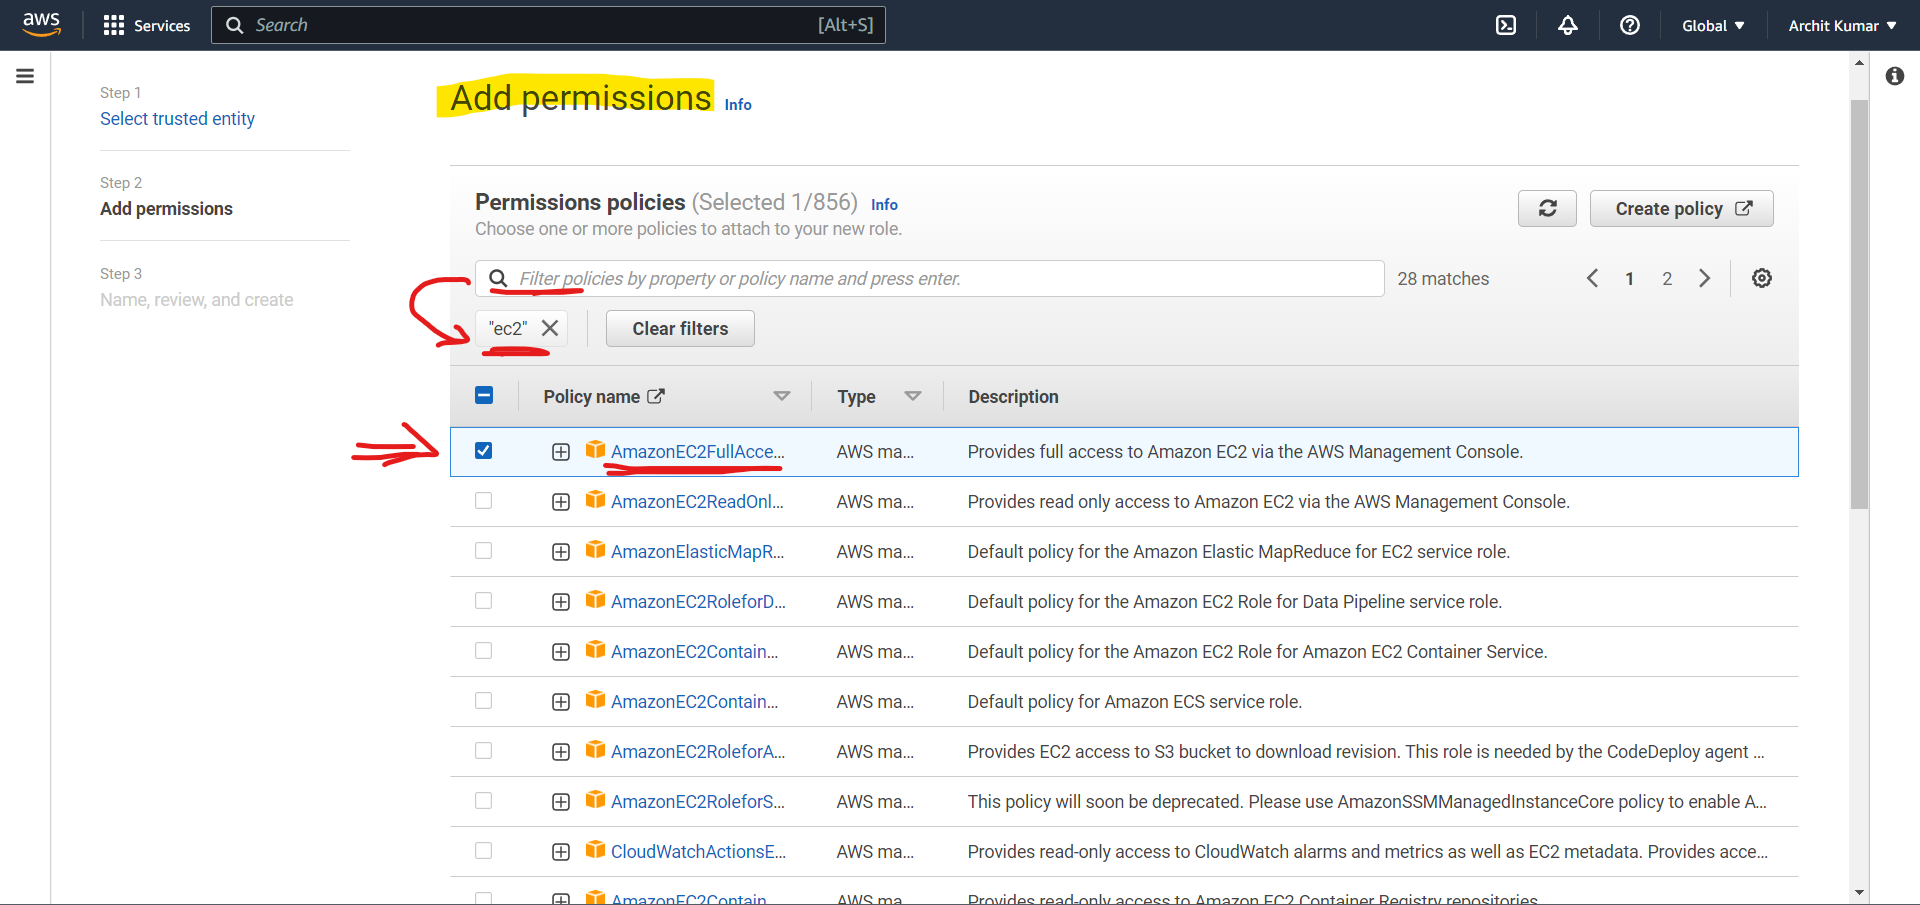
Here, In the "Permission policies", search 'EC2', and you'll get all the permissions possible to create an EC2 role. In this case, we have granted full access to Amazon EC2 Instance.
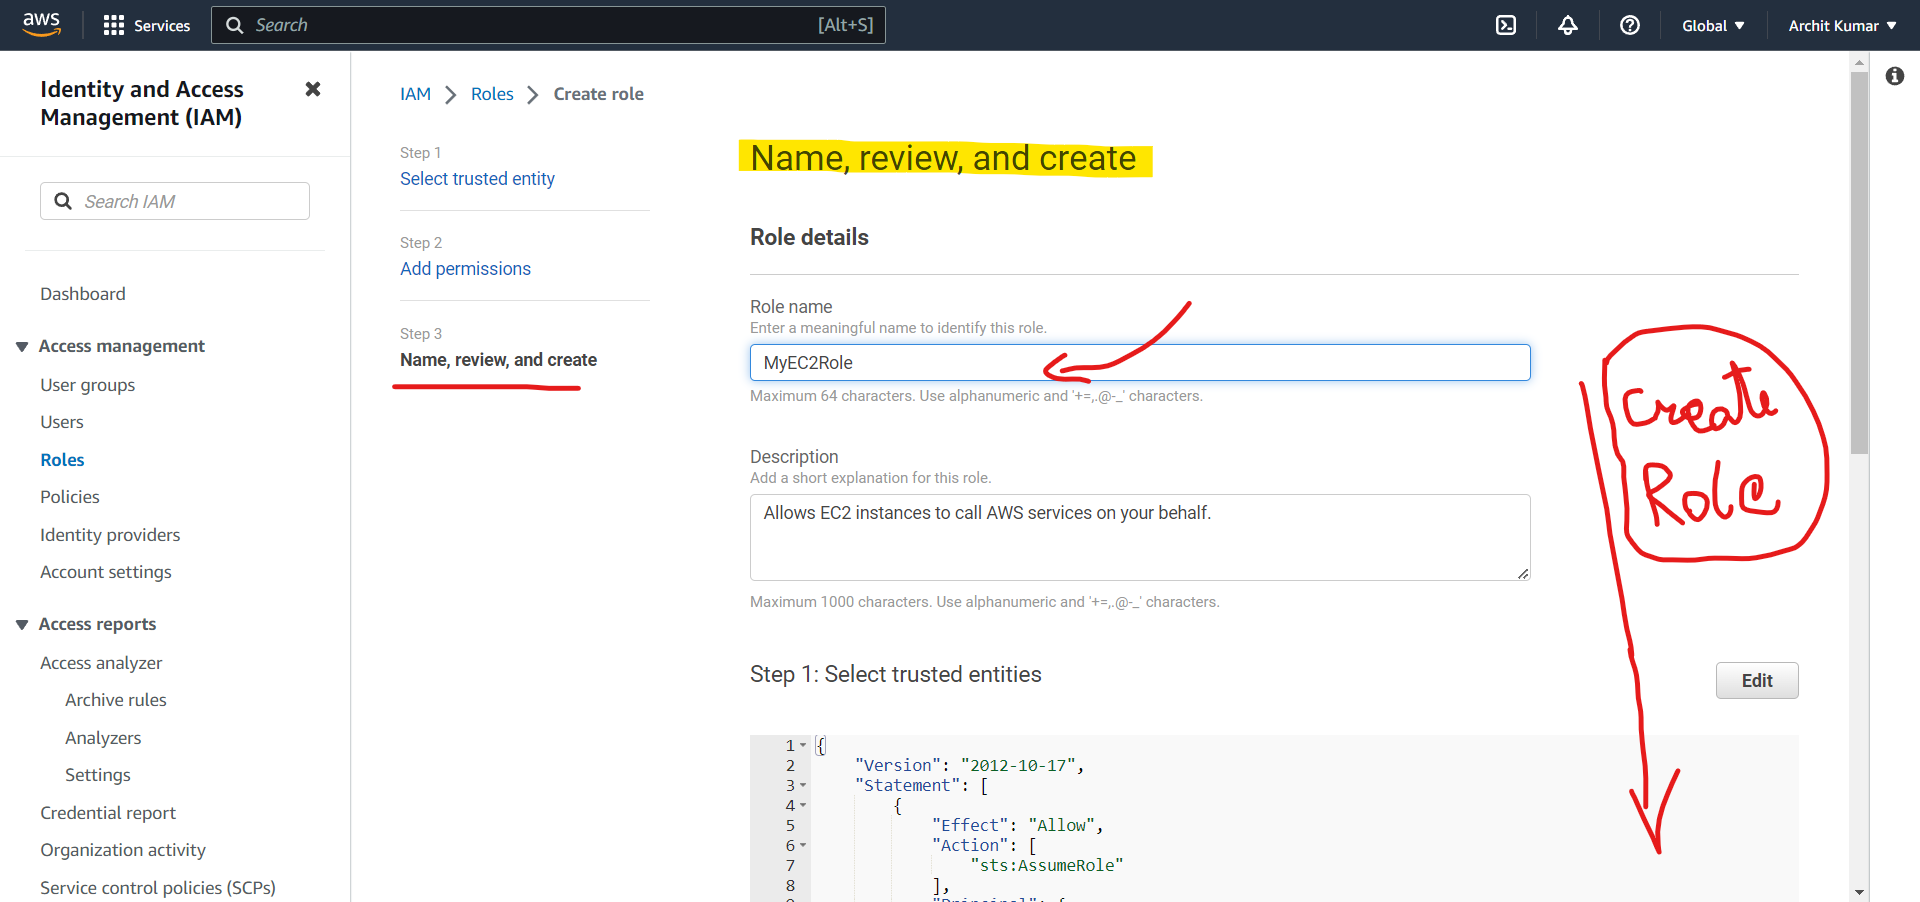
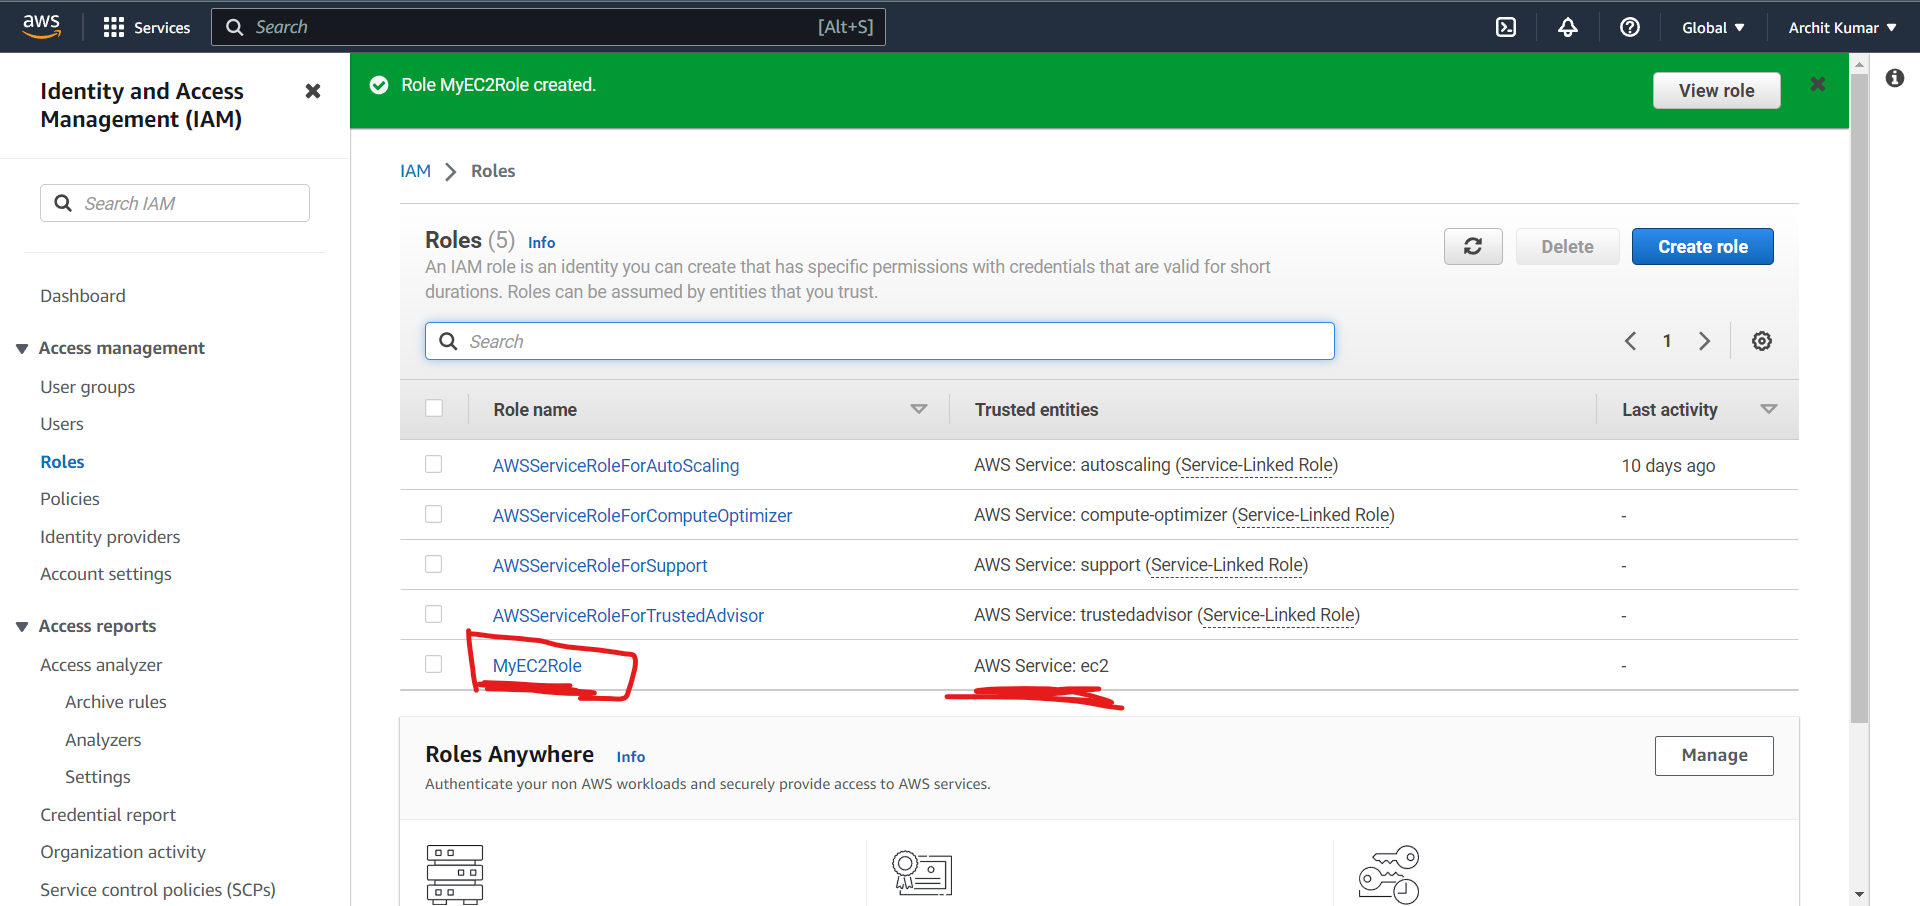
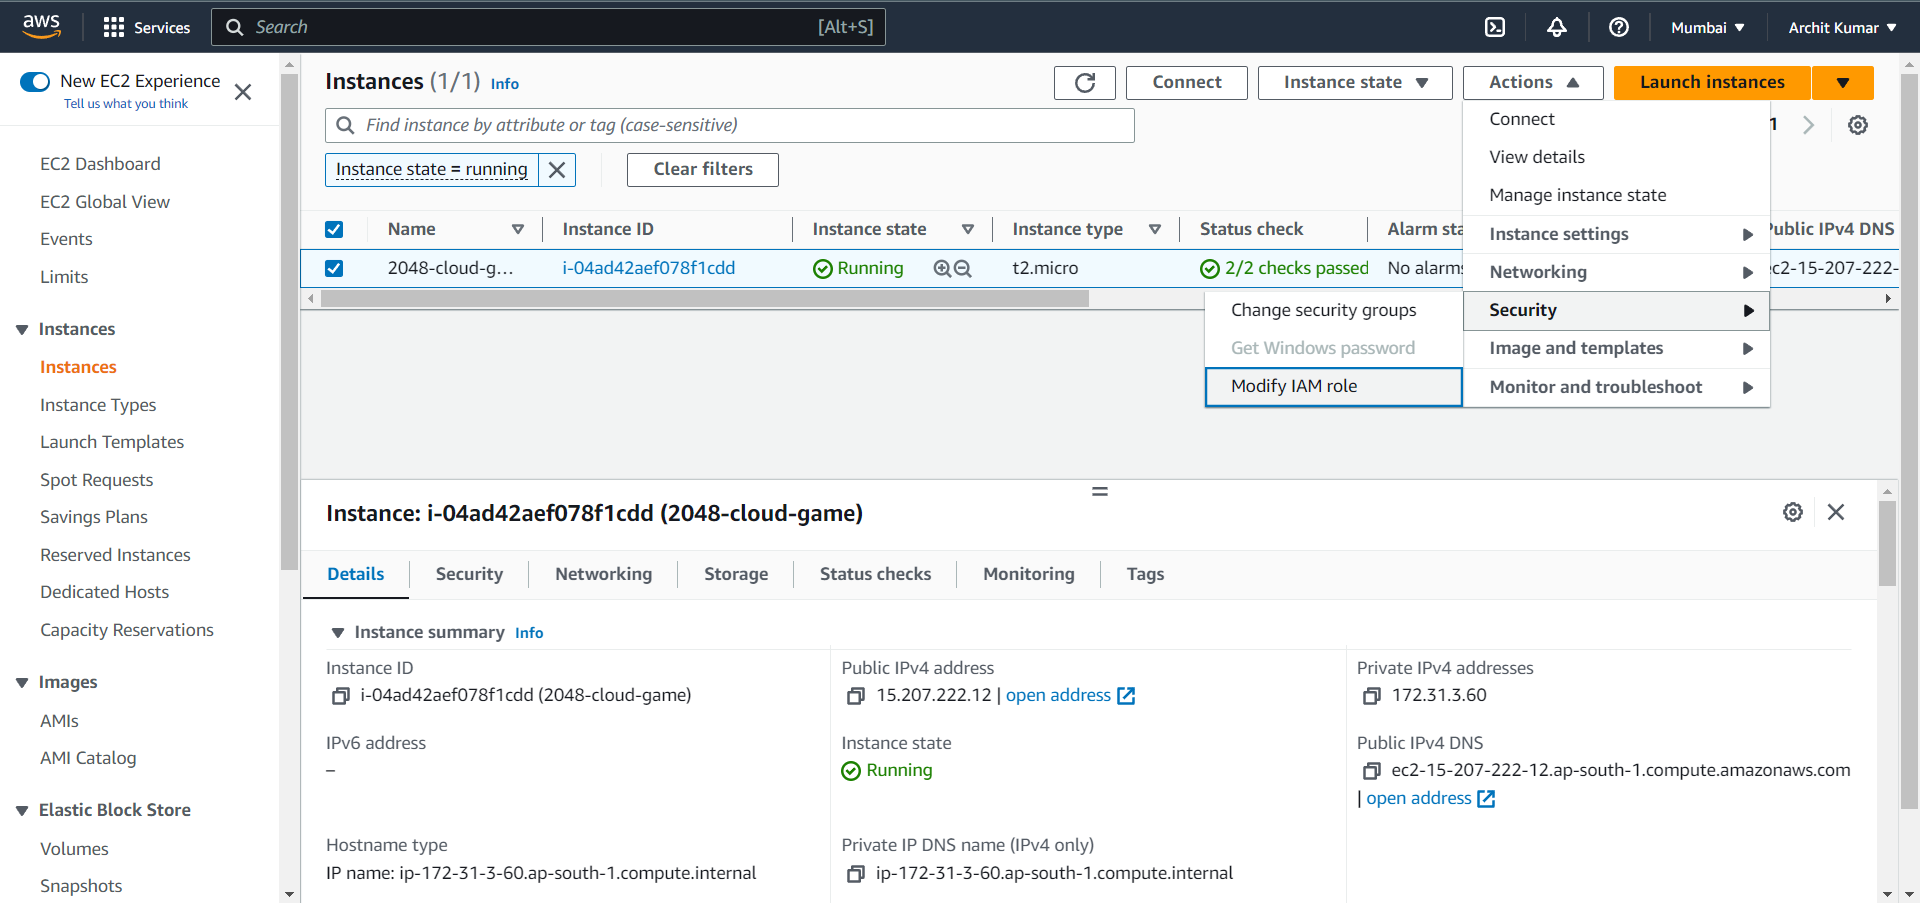
Once you create the role, we also have to attach the role to our running EC2 instance. So to attach the role, we have to go to the EC2 dashboard and select the instance which is running -> then, select "Actions" -> then, security -> and then, Modify IAM role.
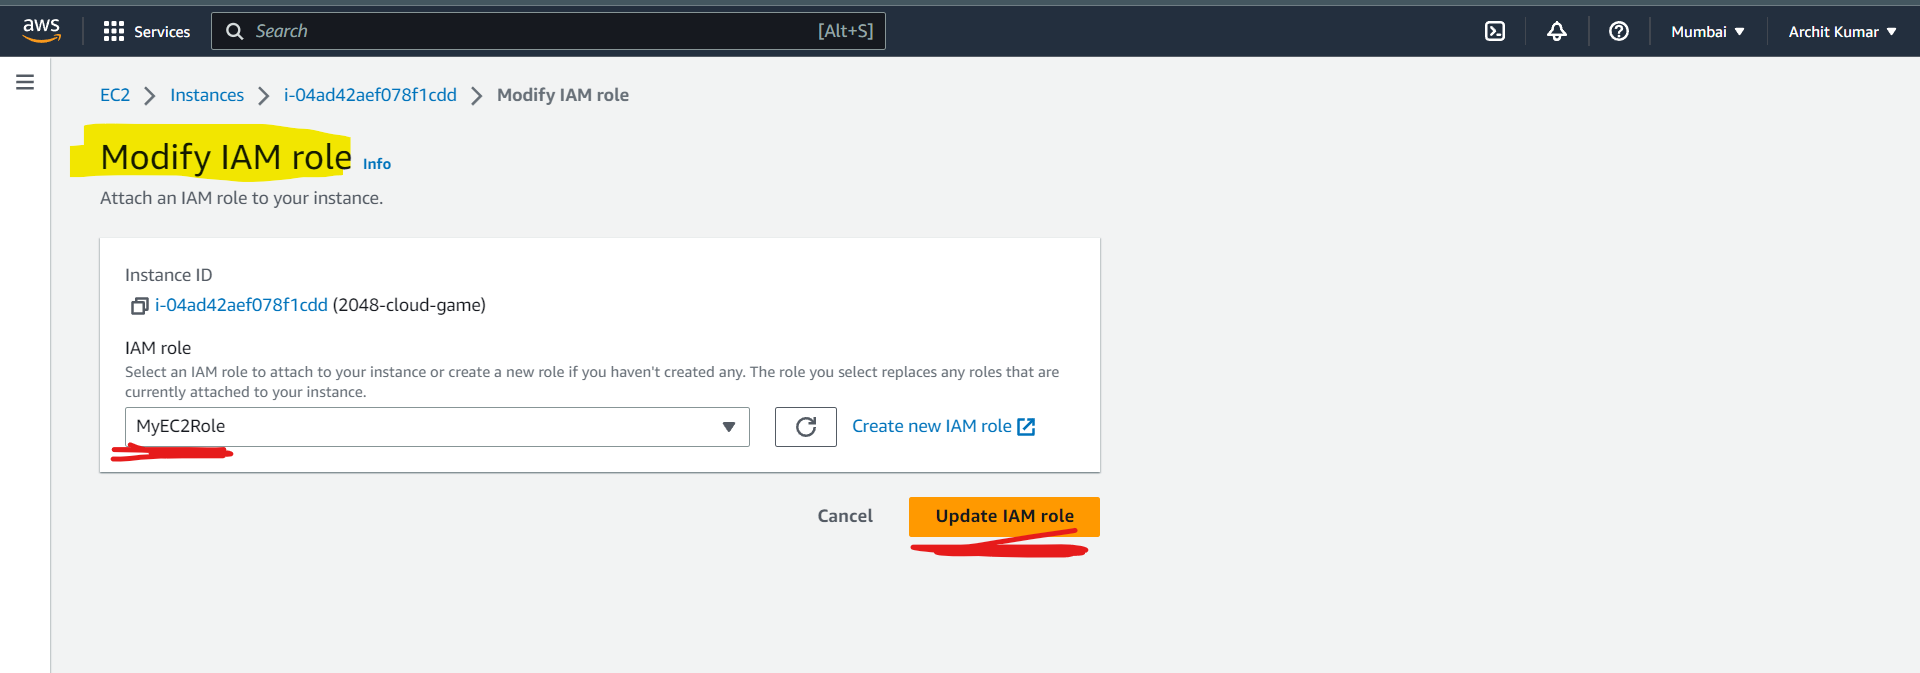
Now, after updating the IAM role into the EC2 instance, go back to the Amazon Elastic Beanstalk, select the role, and press next.
Now, as we can see, steps 3, 4, and 5 are optional, so we can directly jump to step 6 to review and then press submit.
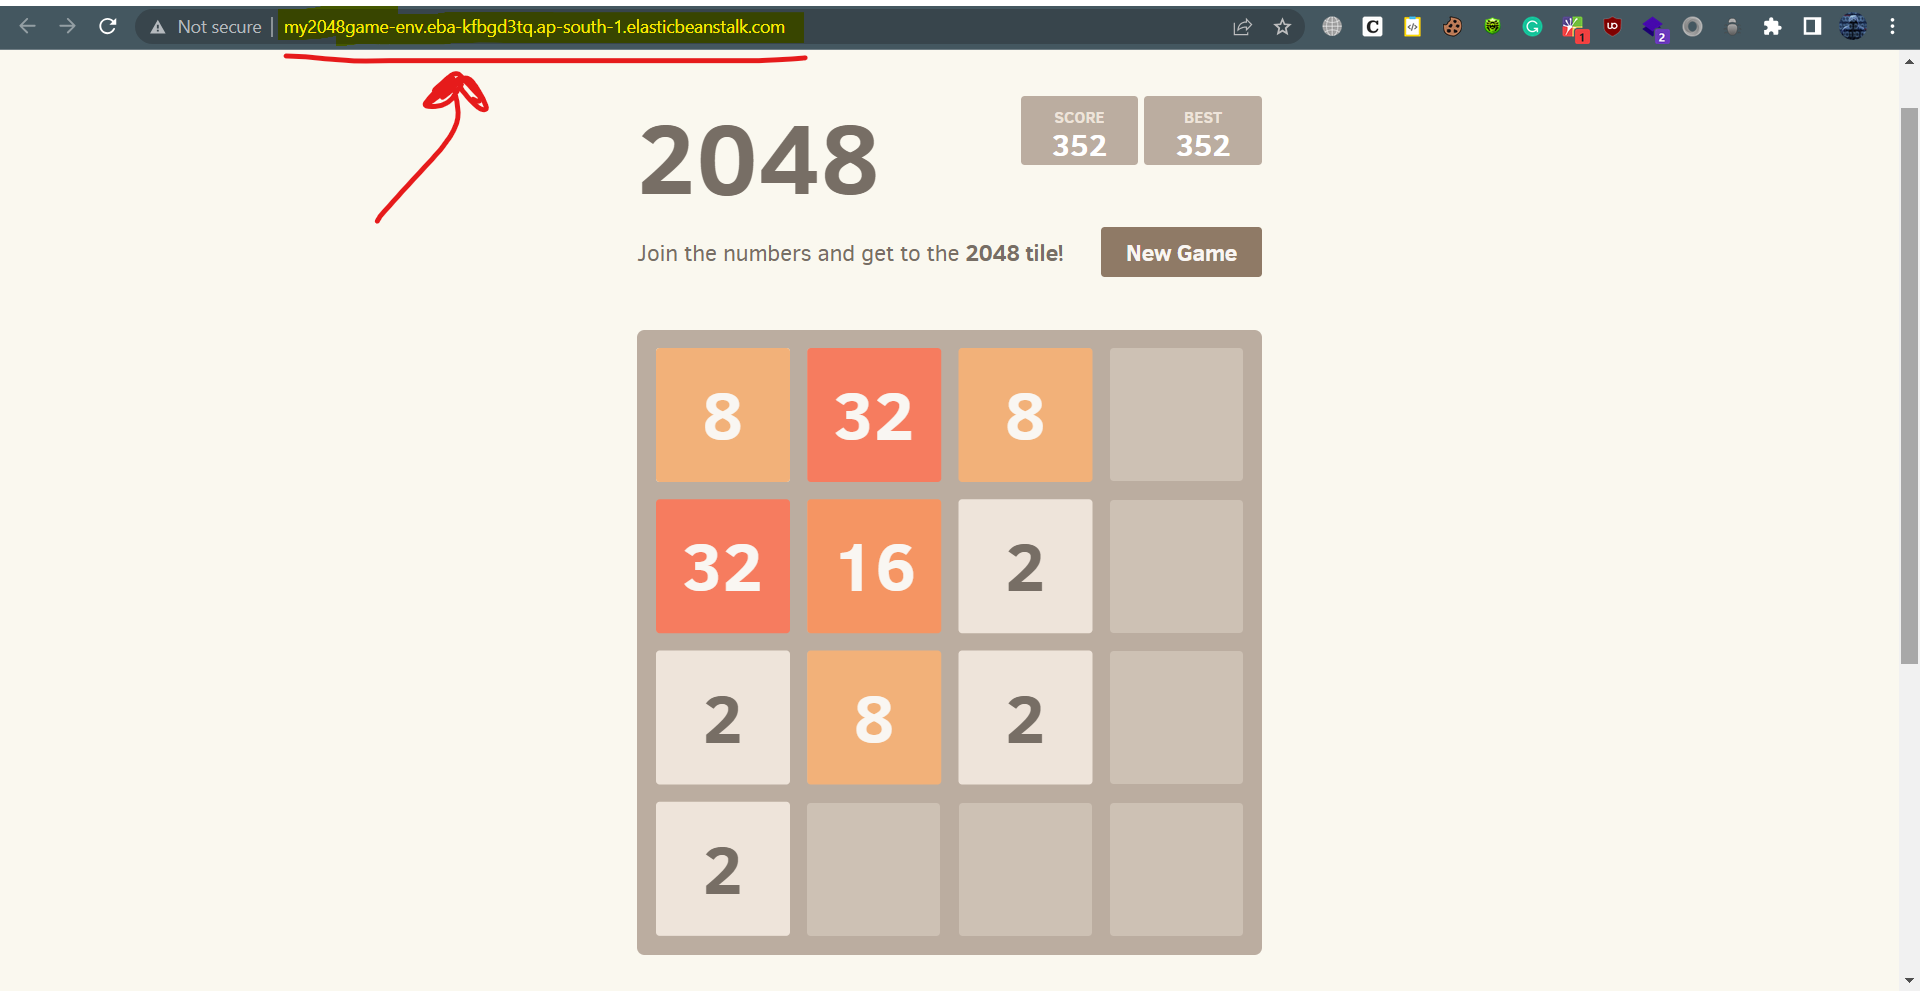
After some time, the environment will be successfully launched, and the application will be finally deployed on Amazon Elastic Beanstalk.
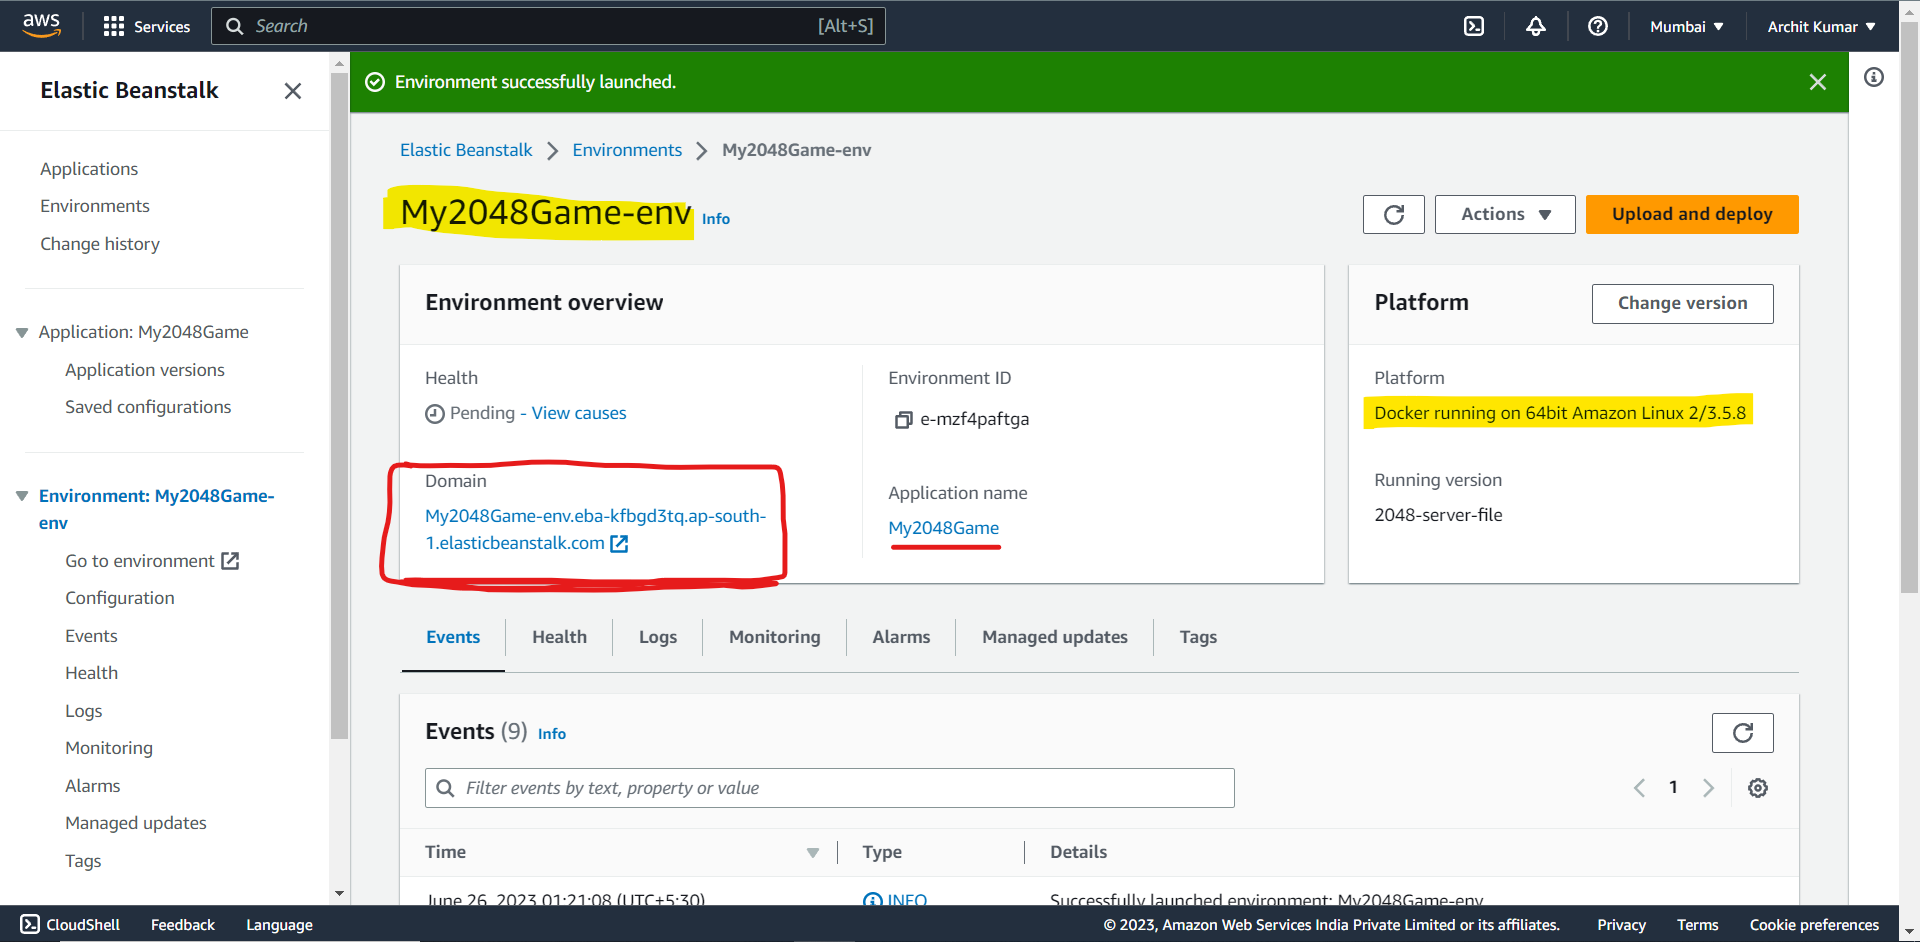
Click on the "Domain", if the game is working, it means that the application is successfully deployed. The link is working on both laptops and mobile phones...👍🏻